My first really difficult built, that I did for me and my little girl. Didn’t have the right tools or experience, so it was built mostly with elbow grease, vision, and determination. The machine supports MAME emulation along with many other consoles.
The Tools
- router – for t-molding slot
- jigsaw – to cut everything
- sander – to sand off the crap job that the jigsaw did
- drill – to screw everything together
- projector – to outline the graphics
- 3d printer – to print speaker grills
The Materials
- acrylic paint – for the graphics
- 5/8 MDF panels – for the frame
- 4:3 LCD – the screen
- Xin-mo controller – buttons and joystick
- spare computer – for the internals
- t-molding – for the edge trim of the cabinet
- power strip – to simplify powering everything
- fluorescent light – to light the marquee
- plexiglass – to cover the screen and for the marquee
- spade drill bit – to cut out circles for the game buttons
- speaker – an old Jawbone speaker for audio
- mini foam paint roller – for a smooth finish
- raspberry pi – worked better than the computer
- wood screws
The Build
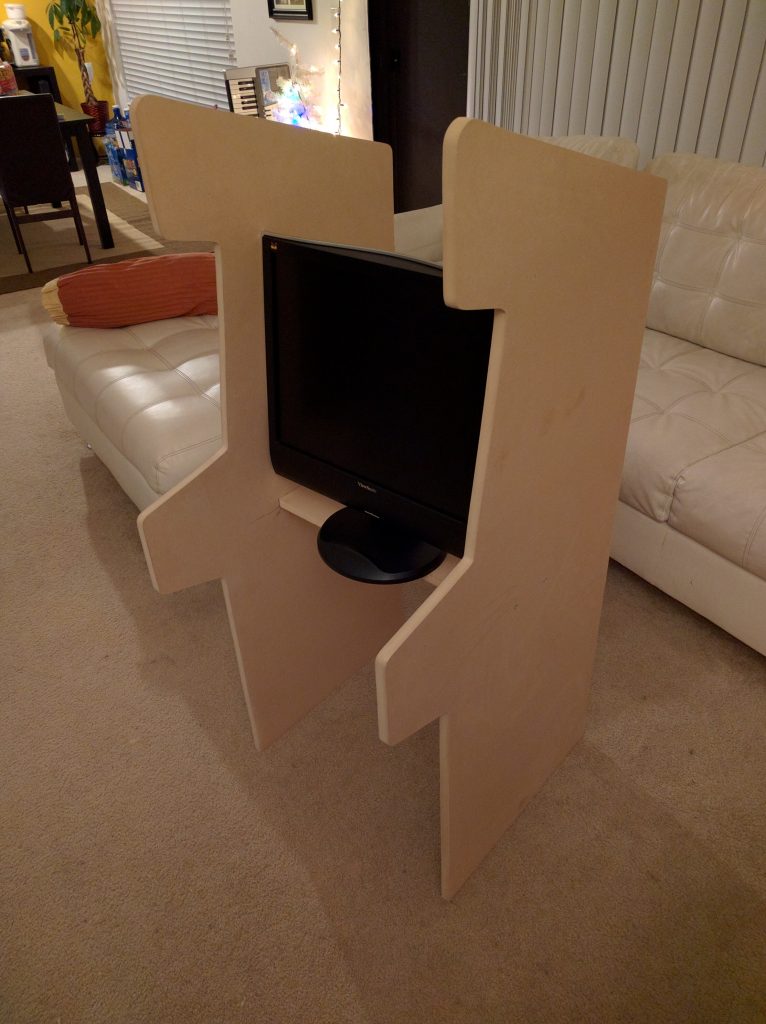
I built everything with 5/8 MDF because it was cheap, sturdy, and the 4×8 panels cut in half at Home Depot provided dimensions just about right.
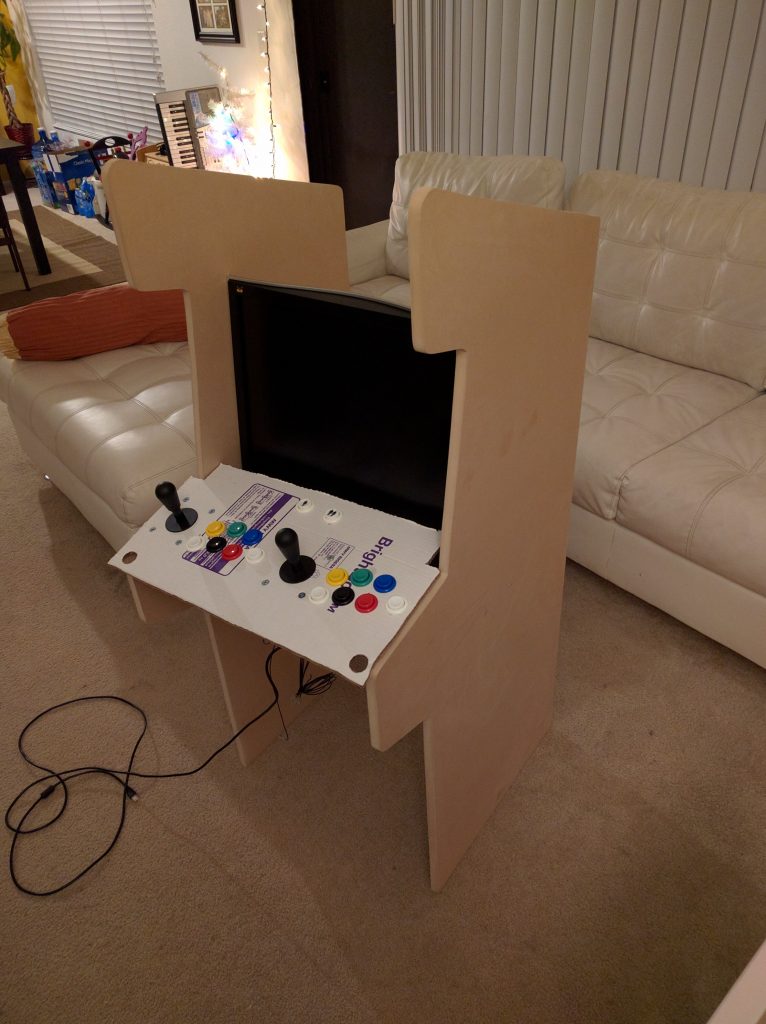
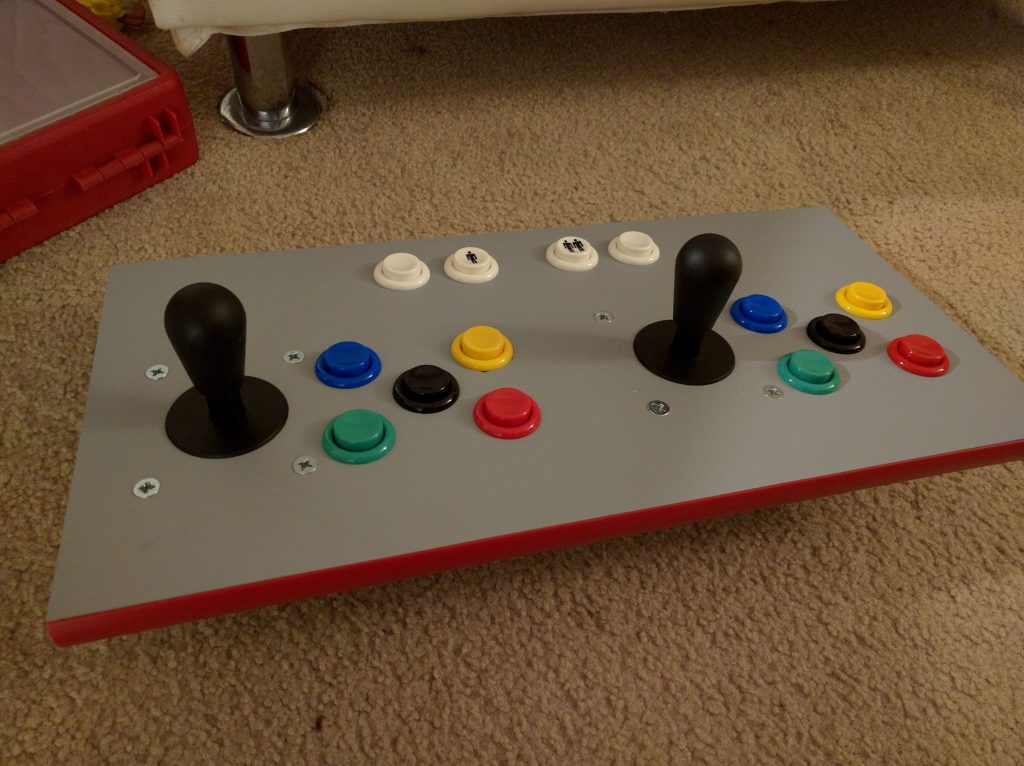
The buttons are from Ebay. You can find them by searching for “Xin-mo buttons” or Jamma. This kit came with all the wiring, 2 joysticks, and colored buttons. Button layout is up to you.
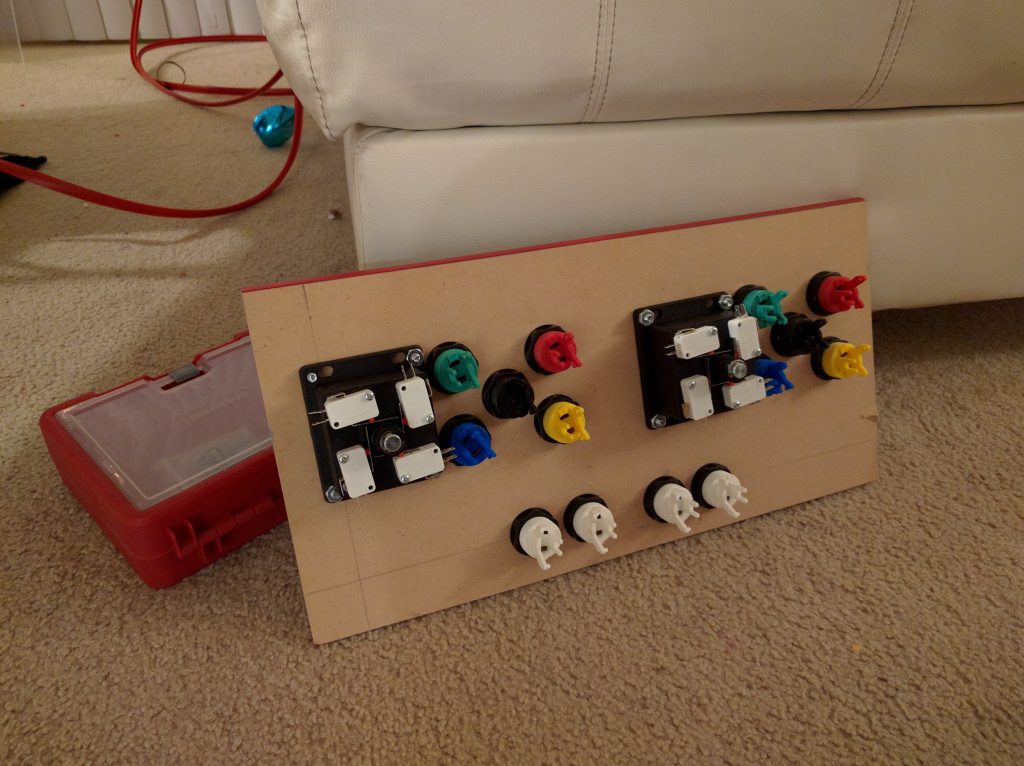
Using a “spade” drill bit that matched the button size, I attached the buttons and screwed in the joysticks. The buttons have a small lip so if the whole isn’t perfect, it’s not a big deal.
The rubber/plastic trim is called t-molding that I got from t-molding.com. Pick your color, they even have light up molding. You need a router to make a cut in the middle of the wood. When you buy the t-molding, they’ll tell you the bit you need with the specs.
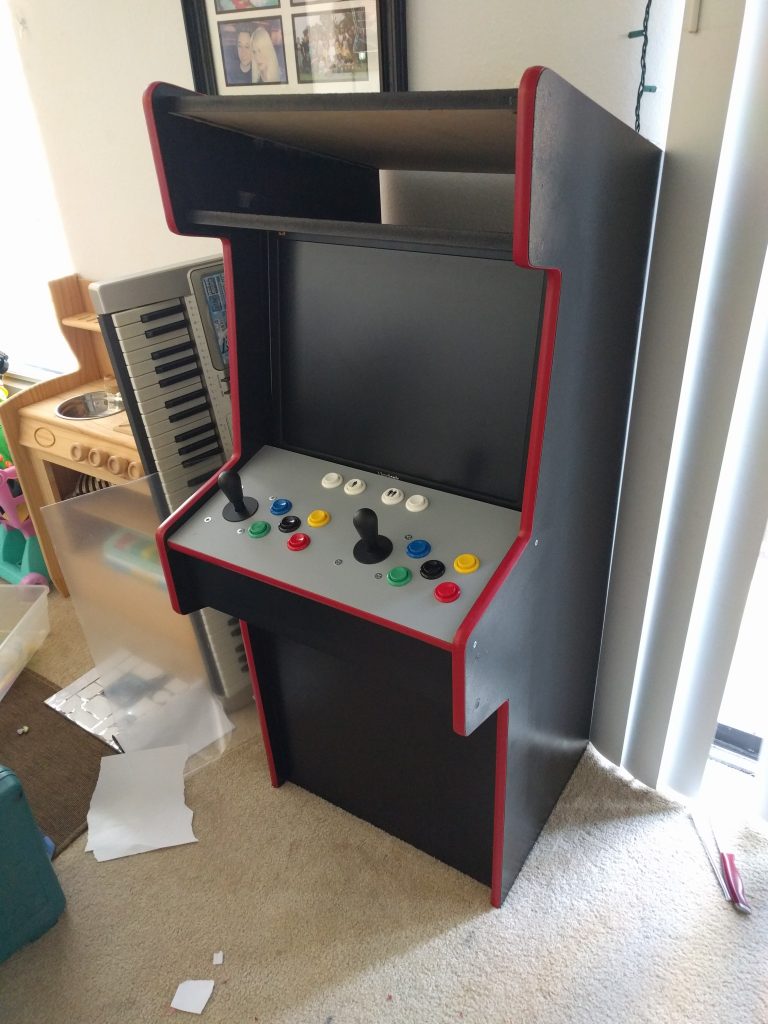
Do NOT paint with a rattle can, use a FOAM roller. The furry roller will not give you a smooth surface. So far all these pieces I cut with a jigsaw. Super dusty, not straight, tons of sanding, would not recommend. Also, I used Phillips screws… I would definitely go with hex. And always use pilot holes! The monitor I found on Craigslist — it’s strange to realize you can barely buy a 4:3 screen anymore.
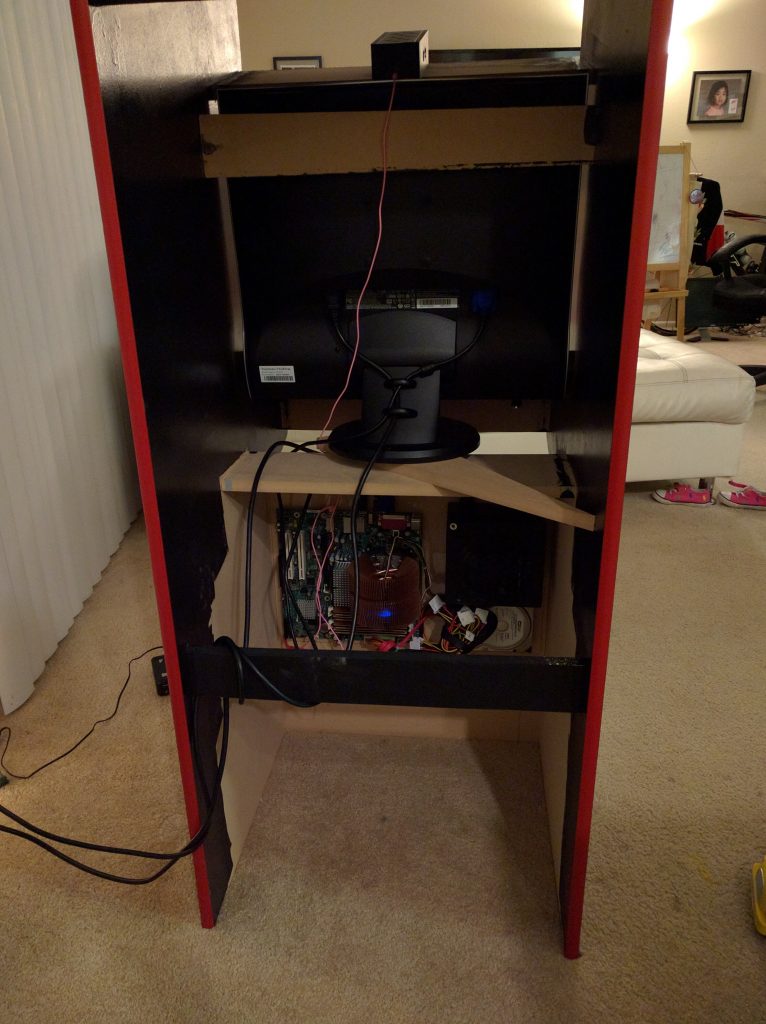
The computer originally was built with leftover computer parts. Later on, I replaced it with a tiny Raspberry Pi that worked even better than this linux based setup!
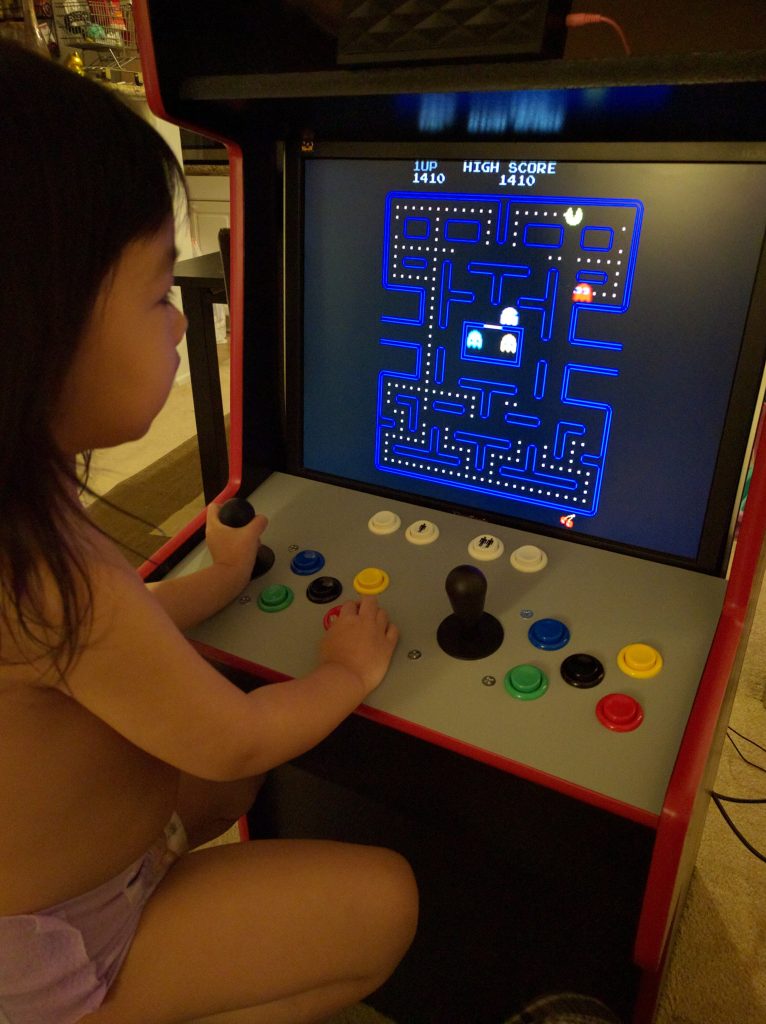
In the useful links section at the bottom of this post, I’ll link where you can find MAME ROMs legitimately. Here is the first test, she likes it!
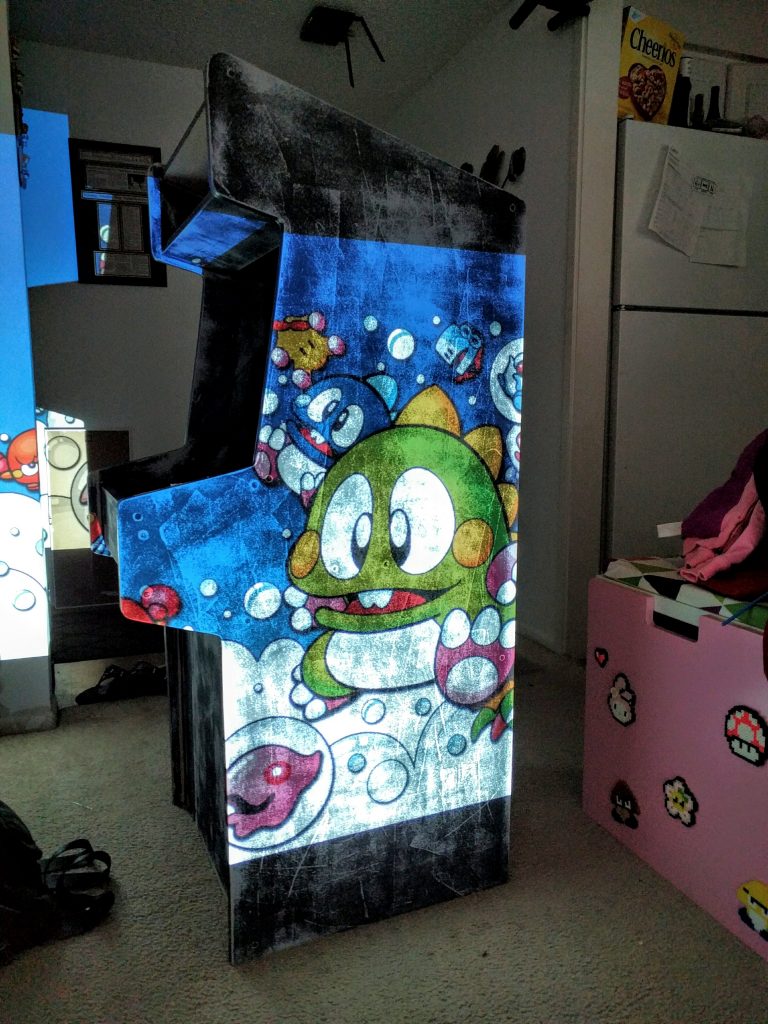
I couldn’t afford to print graphics, so I used my projector to help me trace some graphics which I later painted.
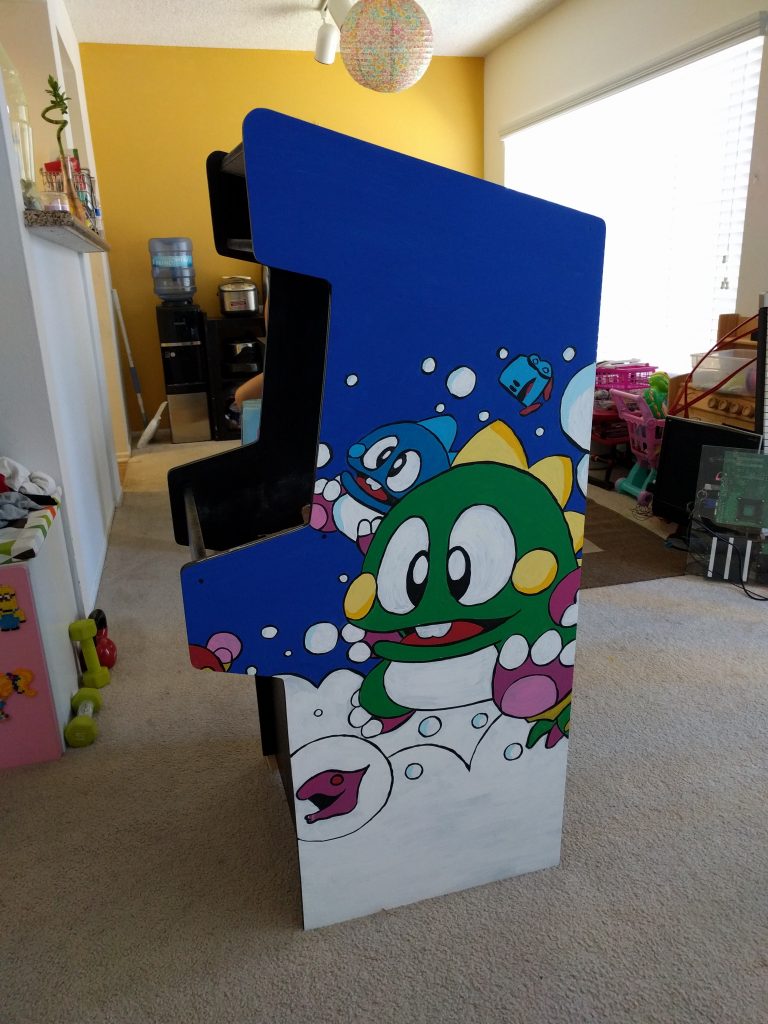
I used acrylic paint, lots of it, then finished it off with black outline, then coated it with rattle can clear coat. Emma is lucky I love her so much, never doing this again. It was incredibly difficult.

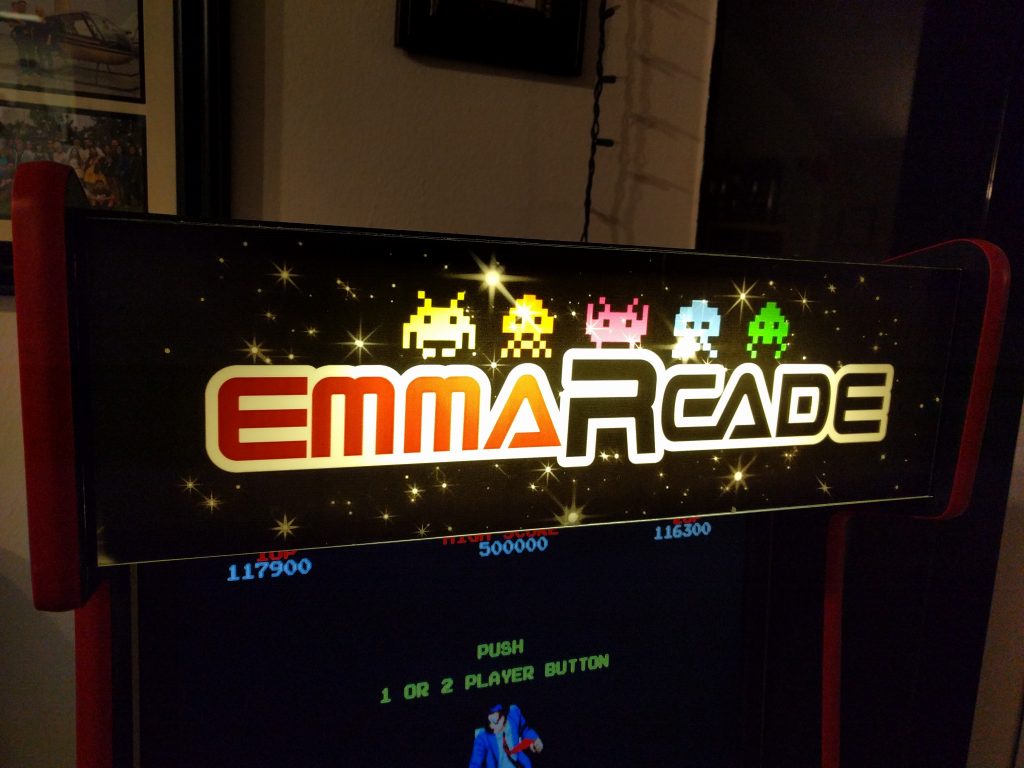
I found a local shop that prints on translucent adhesive. I designed this logo myself (emma-arcade, get it?). I tried to print this on my color laser, but it came out like garbage. The translucent adhesive is stuck onto plexiglass which I cut and mounted with black duct tape. The light is a small 18″ fluorescent light that I easily mounted. I also cut plexiglass as a cover to the monitor.
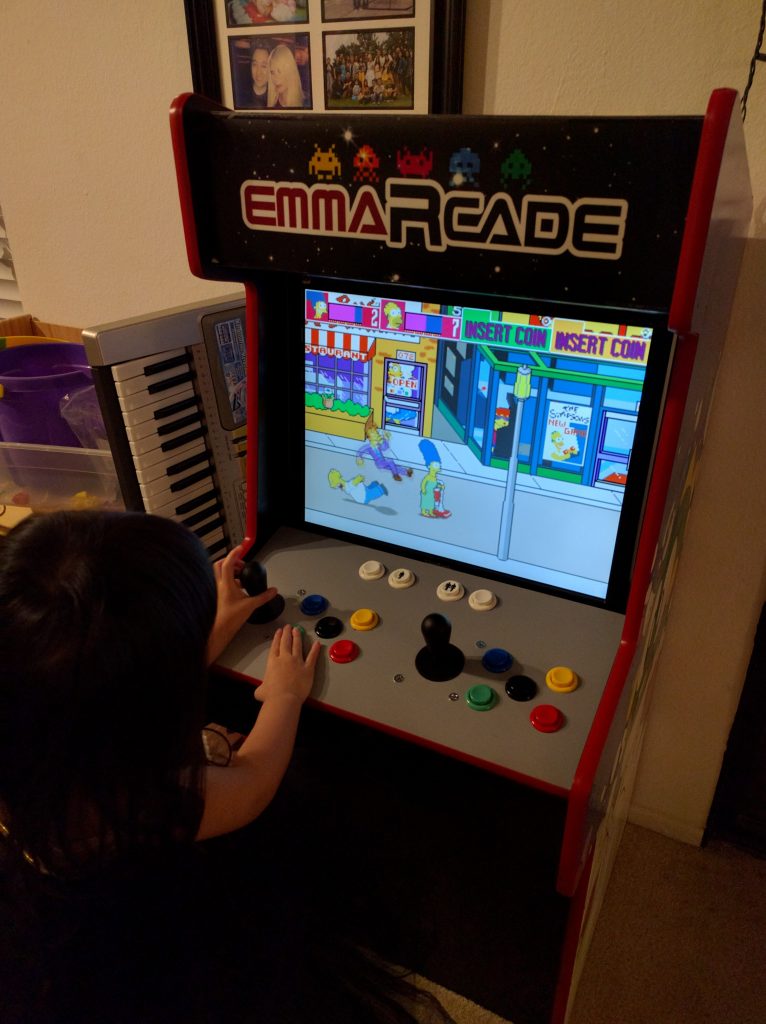
After all that work and finding tons of ROMs, she only wants to play a few games like Simpsons or Teenage Mutant Ninja Turtles.. oh well.
Mistakes
- jigsaw – doing everything with a jigsaw is a bad idea because things aren’t straight, needed a lot of post-sanding, should have used a circular saw w/ guide
- router – the router was too big and hard to route the t-molding slot, should have used a palm router or added flat support to prevent uneven slots (sorta covered by the t-molding, but uneven slots makes for loose molding fitting)
- paint – hand-painting the sides was pain-staking, if you have the graphics and can afford it, get something printed and stuck on
- pilot holes – always drill pilot holes, mdf isn’t that strong
- foam roller – for smooth surfaces, use a smooth roller, learned that the hard way
- computer – I was stubborn and went with a computer, but ended up replacing it with a tiny raspberry pi and used RetroPie, soooo much easier with a nice interface to select games and switch between emulators
- black duct tape – I used black duct tape to mount the front plexiglass pieces but electrical tape worked out much better
Updates
The speakers I used were battery powered, so I bought a pair of cheap computer speakers instead.
The computer setup had a really bad interface, so I ripped everything out and replaced it with a tiny Raspberry Pi running RetroPie, much better!
The speaker grill was terrible so 3D printed 2 speaker grills from thingiverse.com, looks much better.
The fluorescent light I wasn’t happy with, so I replaced it with an LED light strip that was much brighter.
3D printed a little coin door that I will make functional later!