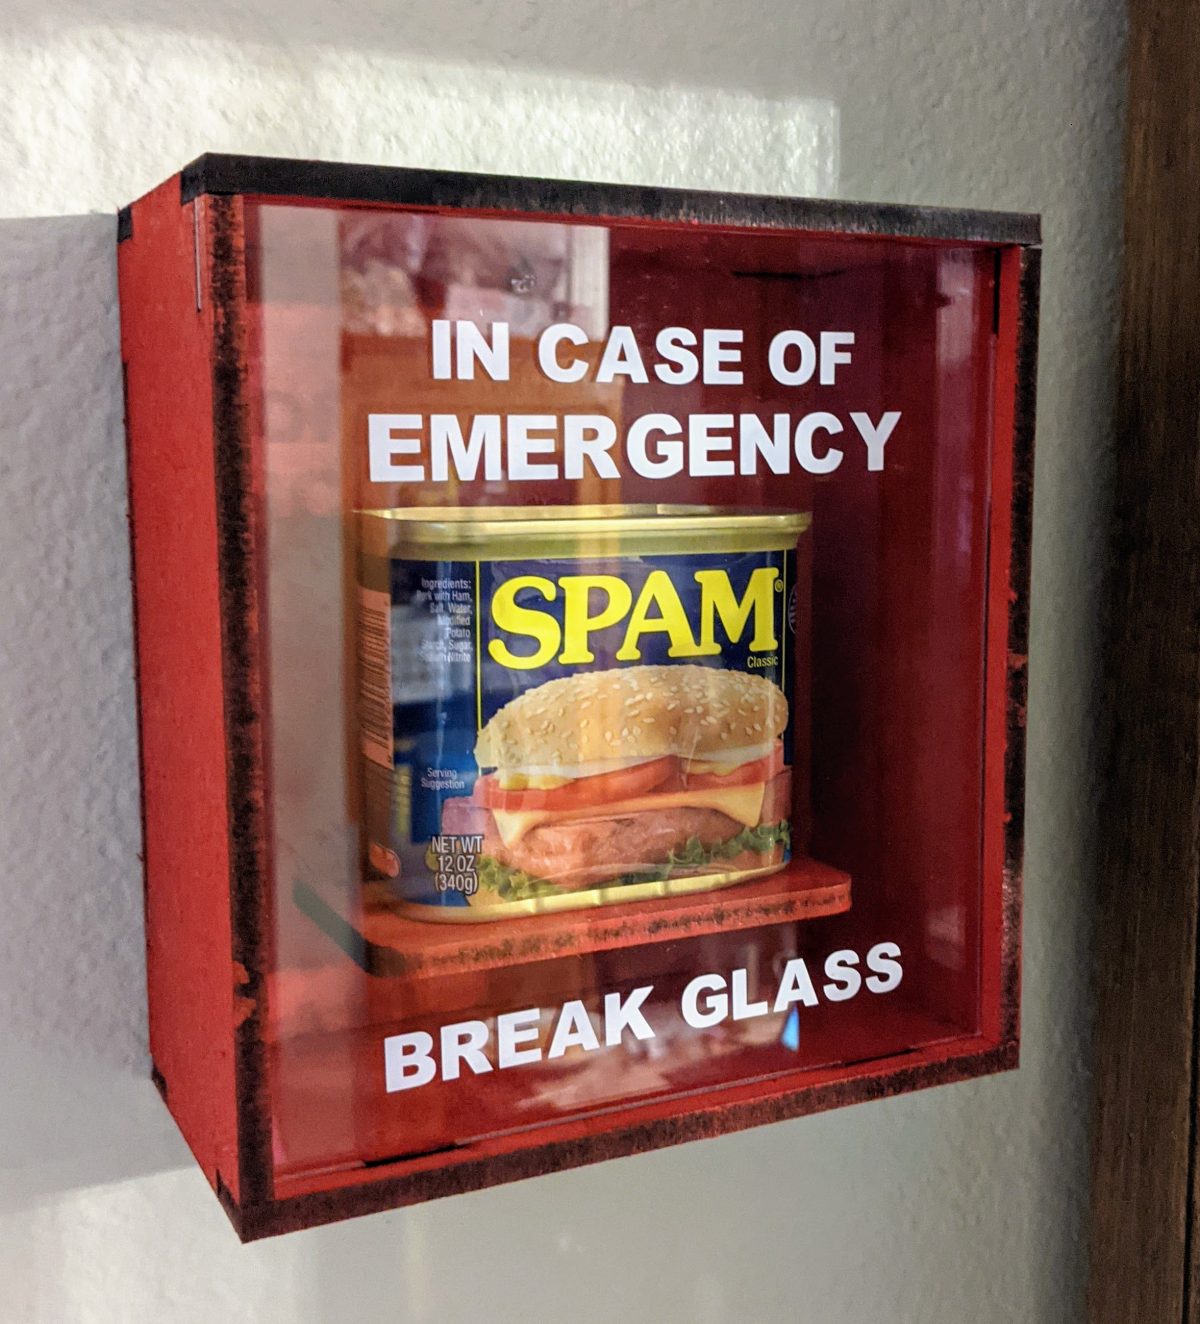
Guys. We’re in the middle of a global pandemic here (Covid19). There is a shortage on toilet paper, PPE and other things. Since I always like to be prepared, I made this emergency SPAM box.
Disclaimer: you can’t actually break the glass, it’s plexiglass.
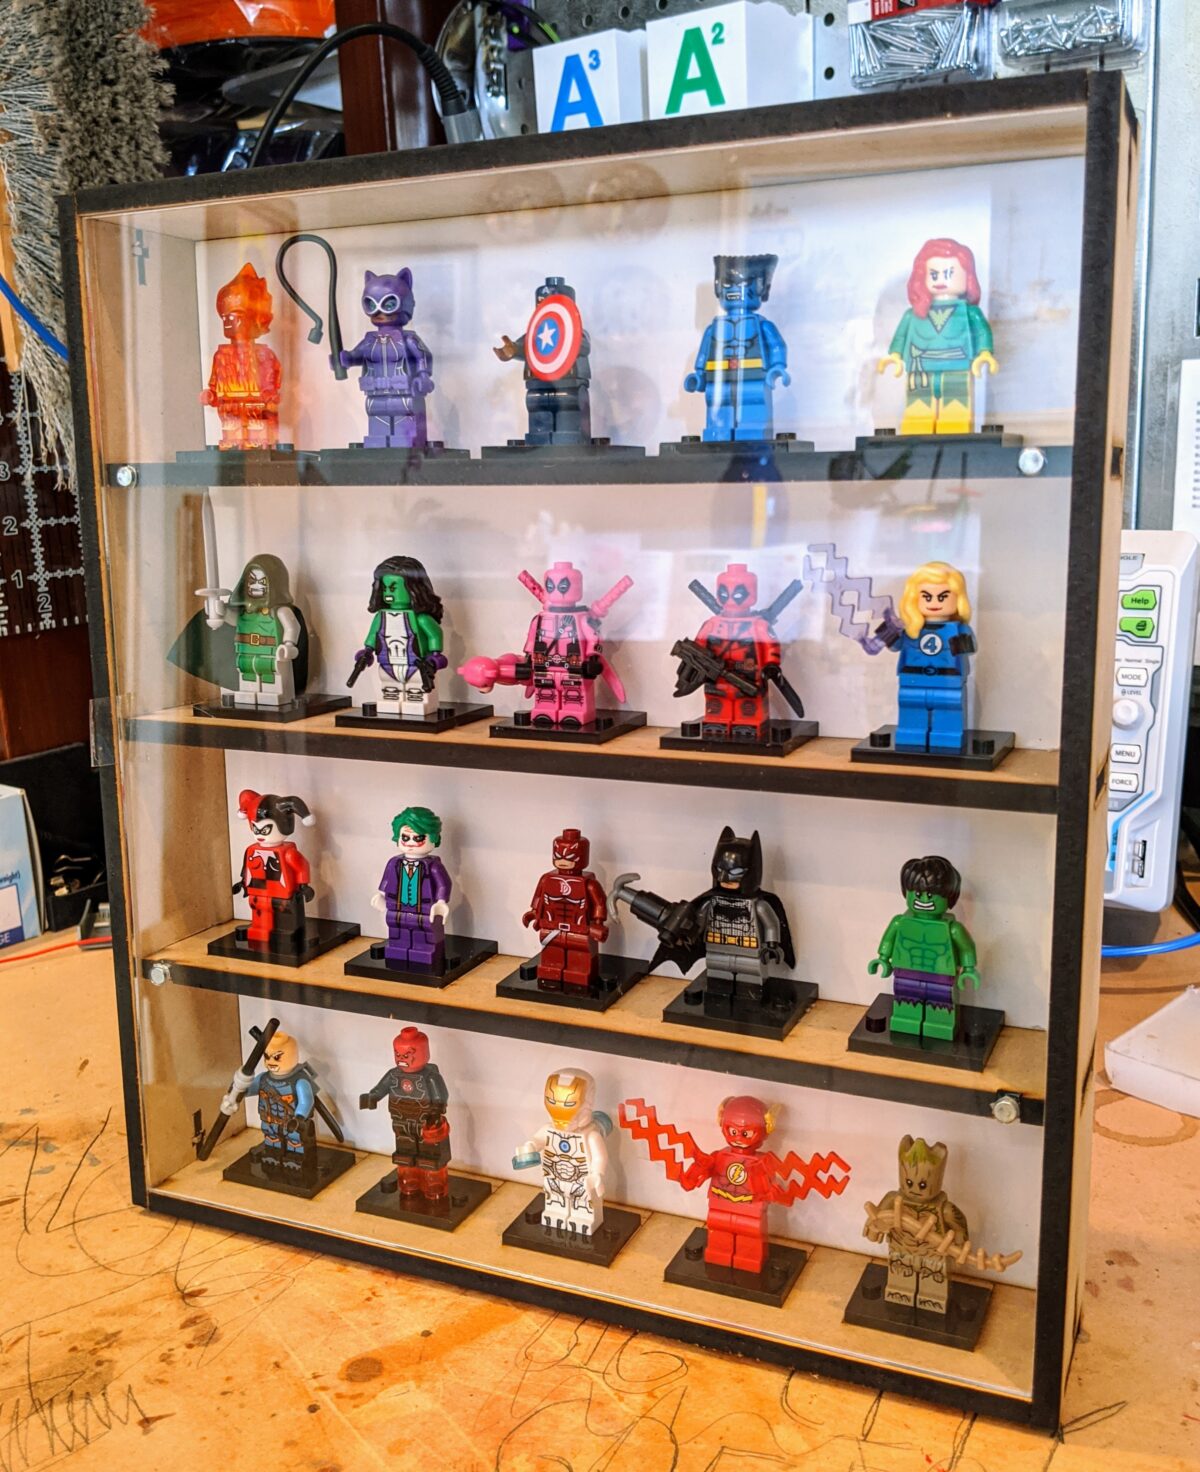
I previously built a minifig display case but it was big, heavy, and awkward. It also did not have a glass cover in the front and seemed to collect lots of dust, so I decided to redo it.
I decided to make it 5 columns 4 rows of minifigs so 20 per display case. The Fusion360 design is totally parametric (I think) so I can easily adjust these to customize it.
Case put together
There are 3 types of material used. 1/4 MDF for the frame and shelves, the white support board (like you get from cheap bookshelves), and plexiglass for the front cover.
M3 nuts and bolts to hold the frame together
I used bolts for the 4 corners of the frame. I did not want to use glue. Here you can see the notch that holds the M3 bolts.
Glass with magnets holding the cover
I used neodymium magnets, 5x3mm circles, to hold the front glass together. The 1st and 3rd shelves have notches where I used epoxy to glue 4 magnets to the shelf. There are also 3mm holes cut in the plexiglass. It’s kind of weird, but works and I didn’t have to use any hinges.
Added the minifigs
I used a hot glue gun to mount the minifigs using the engraged indicators for perfect spacing!
Small collection of figures
After the first one was a success, I made 2 more. Still need another one!
Mounted using picture frame hangers
I used 2 sawtooth picture frame mounts per display case to mount everything to the wall. All done!
Mistakes
probably could have designed the frame mounts in the other direction so the frame can sit flush on a flat surface
Updates
I created another size for my 4 larger minifigs. It really tested my parametric design, which didn’t do so well so I had to make updates.
I noticed that my MDF was pretty fresh, so it was dry and also not as thick as I spec’d it out for. Also, I put the magnets in the middle, but since there is only 1 shelf, it’s a little wobbly. Going to add stoppers the top and bottom to make sure the glass sits straight.
Emma made me this beautiful ceramic heart for Valentines Day! I decided to make a lightbox style frame to hang
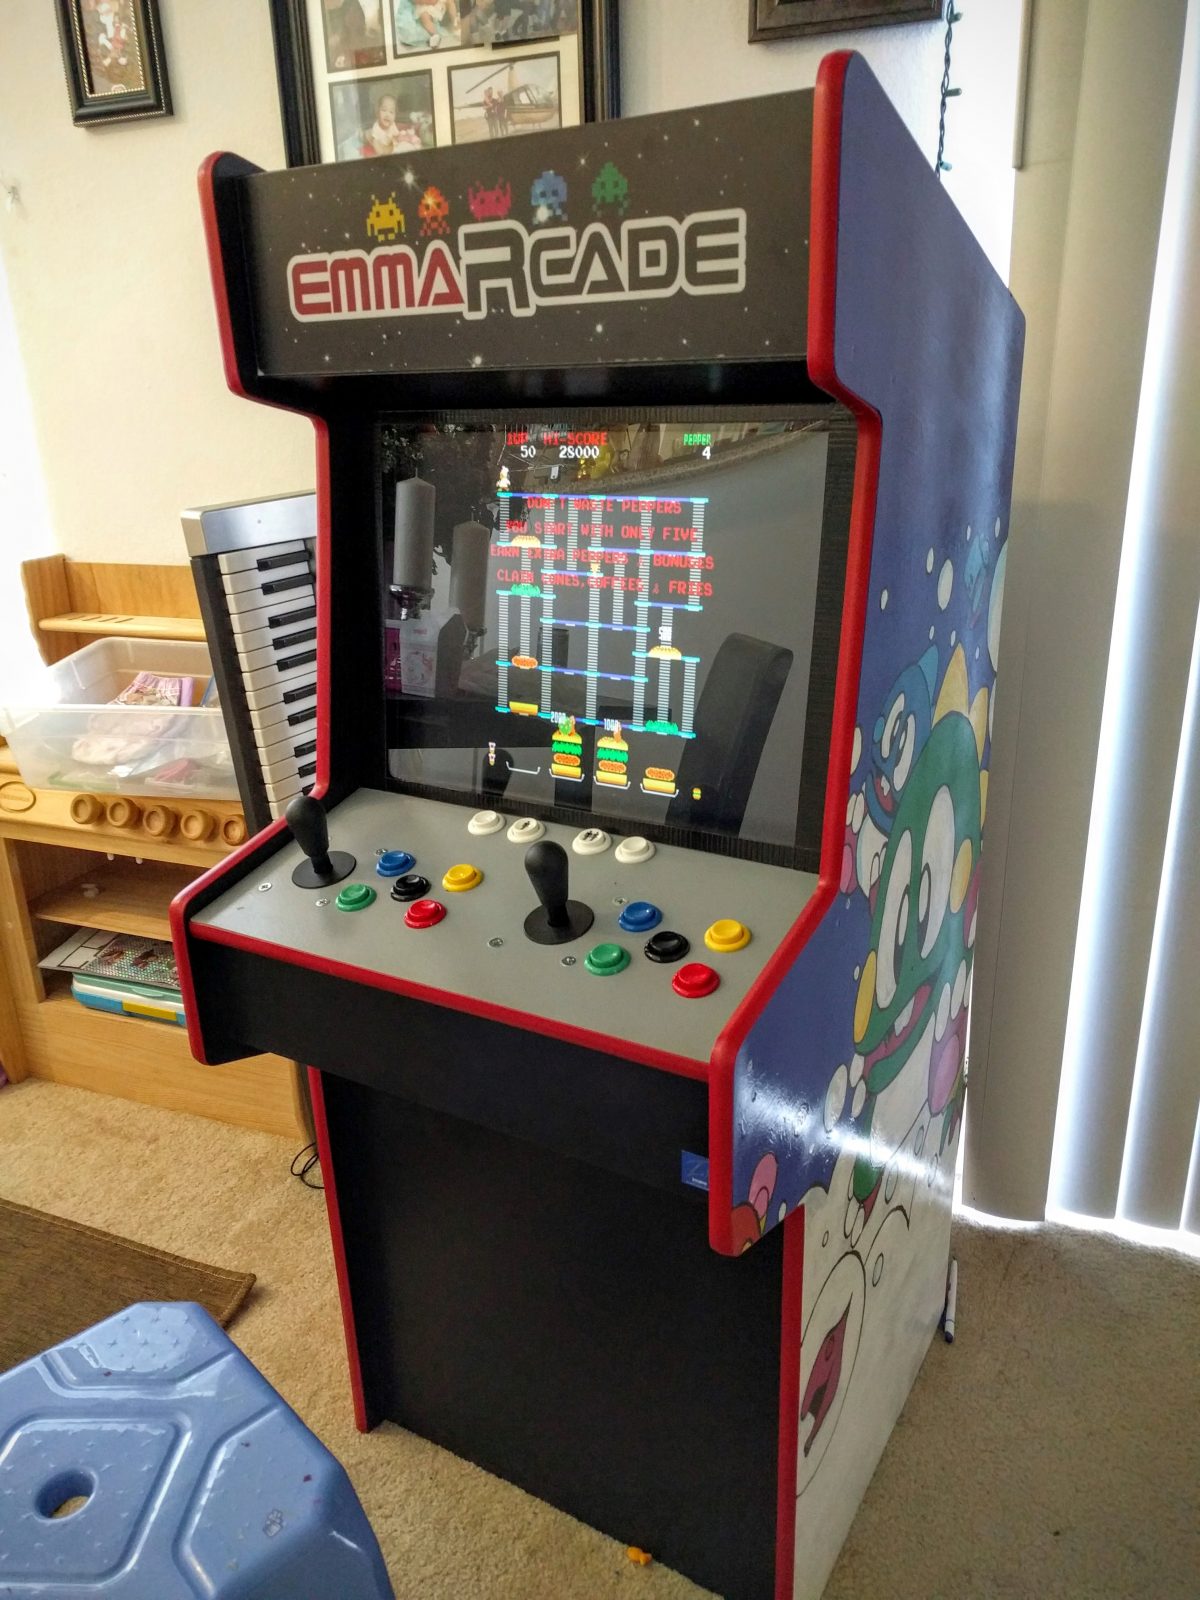
 it on the wall using slots and glue to keep everything secure.
Test cut done with Amazon boxes!
I designed the frame in Fusion360. It was built with 3 different materials and thicknesses: plexiglass, MDF, and supportboard for the back. This is my first multi-part laser piece.
Cutting like butter through the 1/4 MDF
These settings work for me for 1/4 dry MDF. 60watts, 10mm/s, 40-50% power, 2 passes (roughly 13 milliamps). It’s just enough to see the burn through the bottom and pop the pieces out of MDF.
Cut with the final materials
Pieces fit together perfectly. My laser hasn’t been calibrated yet so the cuts were slightly at an angle but for such small connections, it wasn’t an issue.
Added heart to the box, secured with hot glue gun
I added the piece to the frame. The light blue/white heart didn’t show to well with the white background.
Red really made the piece stand out
And here is the final product! Might engrave something on the bottom right later just for fun, but for now it looks amazing.
My first really difficult built, that I did for me and my little girl. Didn’t have the right tools or experience, so it was built mostly with elbow grease, vision, and determination. The machine supports MAME emulation along with many other consoles.
The Tools
router – for t-molding slot
jigsaw – to cut everything
sander – to sand off the crap job that the jigsaw did
drill – to screw everything together
projector – to outline the graphics
3d printer – to print speaker grills
The Materials
acrylic paint – for the graphics
5/8 MDF panels – for the frame
4:3 LCD – the screen
Xin-mo controller – buttons and joystick
spare computer – for the internals
t-molding – for the edge trim of the cabinet
power strip – to simplify powering everything
fluorescent light – to light the marquee
plexiglass – to cover the screen and for the marquee
spade drill bit – to cut out circles for the game buttons
speaker – an old Jawbone speaker for audio
mini foam paint roller – for a smooth finish
raspberry pi – worked better than the computer
wood screws
The Build
Initial frame of the machine
I built everything with 5/8 MDF because it was cheap, sturdy, and the 4×8 panels cut in half at Home Depot provided dimensions just about right.
Mockup of controller placement in cardboard
The buttons are from Ebay. You can find them by searching for “Xin-mo buttons” or Jamma. This kit came with all the wiring, 2 joysticks, and colored buttons. Button layout is up to you.
Measured twice then drilled and screwed on buttons and joysticks.
Using a “spade” drill bit that matched the button size, I attached the buttons and screwed in the joysticks. The buttons have a small lip so if the whole isn’t perfect, it’s not a big deal.
Final controls, painted, with t-molding
The rubber/plastic trim is called t-molding that I got from t-molding.com. Pick your color, they even have light up molding. You need a router to make a cut in the middle of the wood. When you buy the t-molding, they’ll tell you the bit you need with the specs.
Painted and added trim all around
Do NOT paint with a rattle can, use a FOAM roller. The furry roller will not give you a smooth surface. So far all these pieces I cut with a jigsaw. Super dusty, not straight, tons of sanding, would not recommend. Also, I used Phillips screws… I would definitely go with hex. And always use pilot holes! The monitor I found on Craigslist — it’s strange to realize you can barely buy a 4:3 screen anymore.
The rear of the machine with the computer mounted
The computer originally was built with leftover computer parts. Later on, I replaced it with a tiny Raspberry Pi that worked even better than this linux based setup!
First MAME game, success!
In the useful links section at the bottom of this post, I’ll link where you can find MAME ROMs legitimately. Here is the first test, she likes it!
Getting ready to painstakingly paint the cabinet
I couldn’t afford to print graphics, so I used my projector to help me trace some graphics which I later painted.
Finished side… only took 4 hours
I used acrylic paint, lots of it, then finished it off with black outline, then coated it with rattle can clear coat. Emma is lucky I love her so much, never doing this again. It was incredibly difficult.
Here is the other side. I know, it doesn’t match, but whatever.The marquee I custom designed and got printed at a shop.
I found a local shop that prints on translucent adhesive. I designed this logo myself (emma-arcade, get it?). I tried to print this on my color laser, but it came out like garbage. The translucent adhesive is stuck onto plexiglass which I cut and mounted with black duct tape. The light is a small 18″ fluorescent light that I easily mounted. I also cut plexiglass as a cover to the monitor.
Finally playing games!
After all that work and finding tons of ROMs, she only wants to play a few games like Simpsons or Teenage Mutant Ninja Turtles.. oh well.
Mistakes
jigsaw – doing everything with a jigsaw is a bad idea because things aren’t straight, needed a lot of post-sanding, should have used a circular saw w/ guide
router – the router was too big and hard to route the t-molding slot, should have used a palm router or added flat support to prevent uneven slots (sorta covered by the t-molding, but uneven slots makes for loose molding fitting)
paint – hand-painting the sides was pain-staking, if you have the graphics and can afford it, get something printed and stuck on
pilot holes – always drill pilot holes, mdf isn’t that strong
foam roller – for smooth surfaces, use a smooth roller, learned that the hard way
computer – I was stubborn and went with a computer, but ended up replacing it with a tiny raspberry pi and used RetroPie, soooo much easier with a nice interface to select games and switch between emulators
black duct tape – I used black duct tape to mount the front plexiglass pieces but electrical tape worked out much better
Updates
The speakers I used were battery powered, so I bought a pair of cheap computer speakers instead.
The computer setup had a really bad interface, so I ripped everything out and replaced it with a tiny Raspberry Pi running RetroPie, much better!
The speaker grill was terrible so 3D printed 2 speaker grills from thingiverse.com, looks much better.
The fluorescent light I wasn’t happy with, so I replaced it with an LED light strip that was much brighter.
3D printed a little coin door that I will make functional later!