Not sure why, but I wanted to create my own street light. It features LEDs, an ESP8266 microcontroller with WiFi and notifications, resin-cast lenses from silicon molds, 3D printed parts, as well as some store bought piping.
The Tools
- 3D printer (Creality CR-10)
- dremel with saw attachment
- mini blowtorch
- hot glue gun
- soldering iron
- hand saw
- C/C++ (Python3 server)
The Materials
- black and clear PLA filament
- 2 part silicon mold compound
- 2 part epoxy resin compound
- food coloring and epoxy tiny
- M2 bolts and nuts
- sandpaper
- grey filling undercoat rattlecan
- high temp matte black paint rattlecan
- pvc pipe
- ESP8266 micro controller
The Design
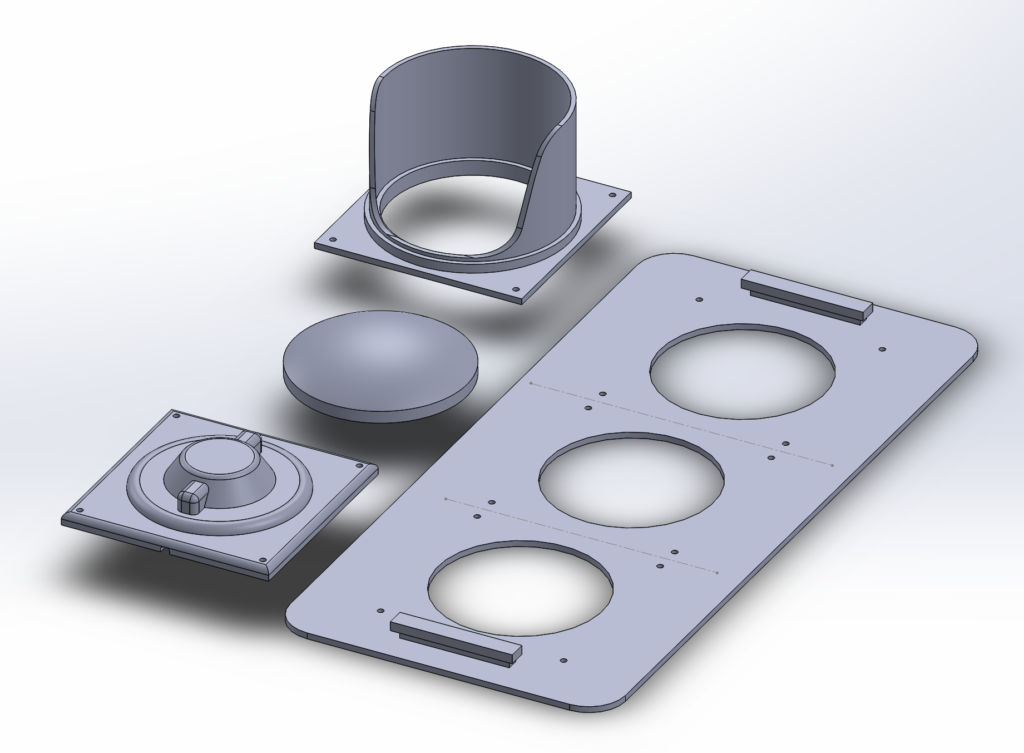
I eye-balled the design after staring at pictures of street lights. I noticed that they are different everywhere. Some have fully round covers, others are cut out like I have. Some have small backs, some large. Some are black with yellow outlines, some don’t. The pro is that I just need to design something close, the con is that there’s no single classic design.


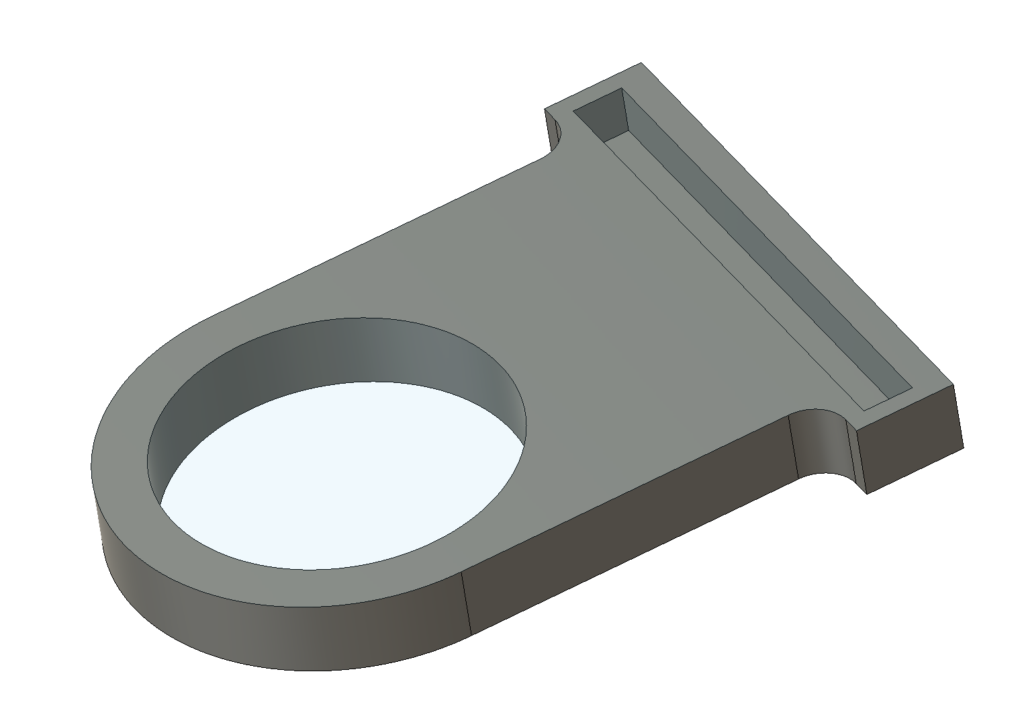
The above files were all designed in Solidworks. They are meant to be assembled using M2 bolts/nuts to give it the industrial look. I didn’t design the pole/stand yet because I wanted to get a feel for the size first before deciding on the pole height and thickness.
The Build
I was really unhappy with the “transparent” PLA that i used to print the lenses. There were 2 versions I printed in attempting to get it clear. They were a big fail, but I ended up using it to make a silicone mold which I use to cast resin which worked out much better!
Of course my existing silicone compound had expired. I didn’t even know they have expiration dates. You can see it’s nearly full, only used it once for a test. Had to buy compound as these have about a 1 year shelf life, or a few months if you open the bottle.
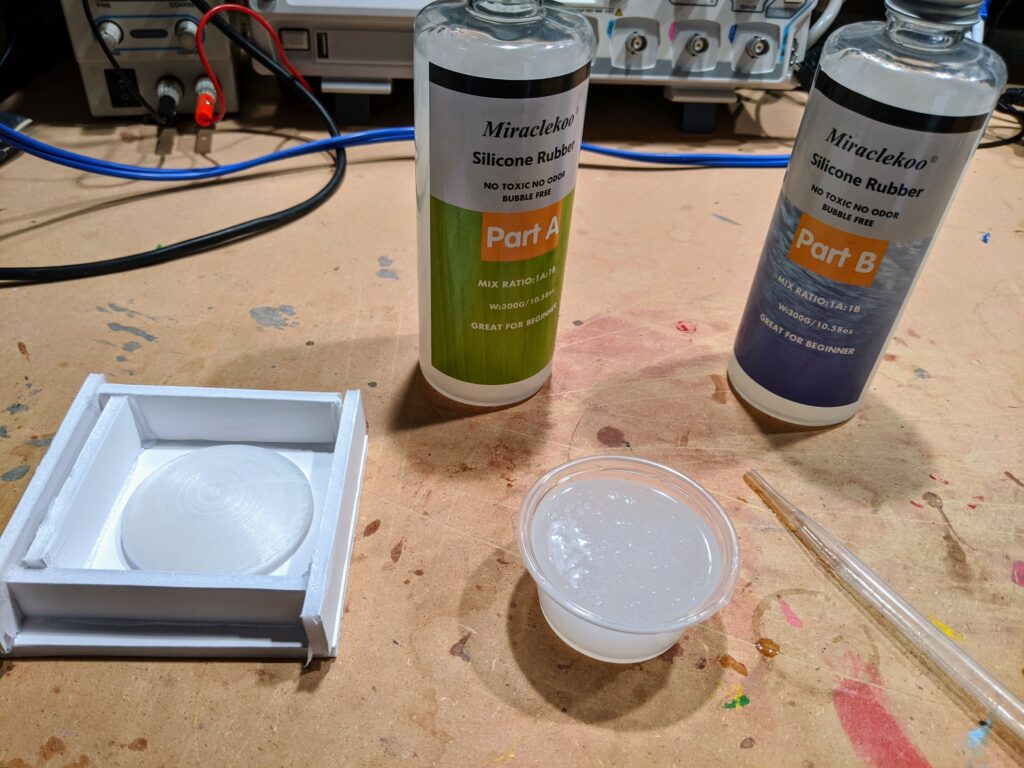
I used a glue gun and foam board to put together a tiny box for the mold. I also glued the lens the bottom to prevent it from shifting.
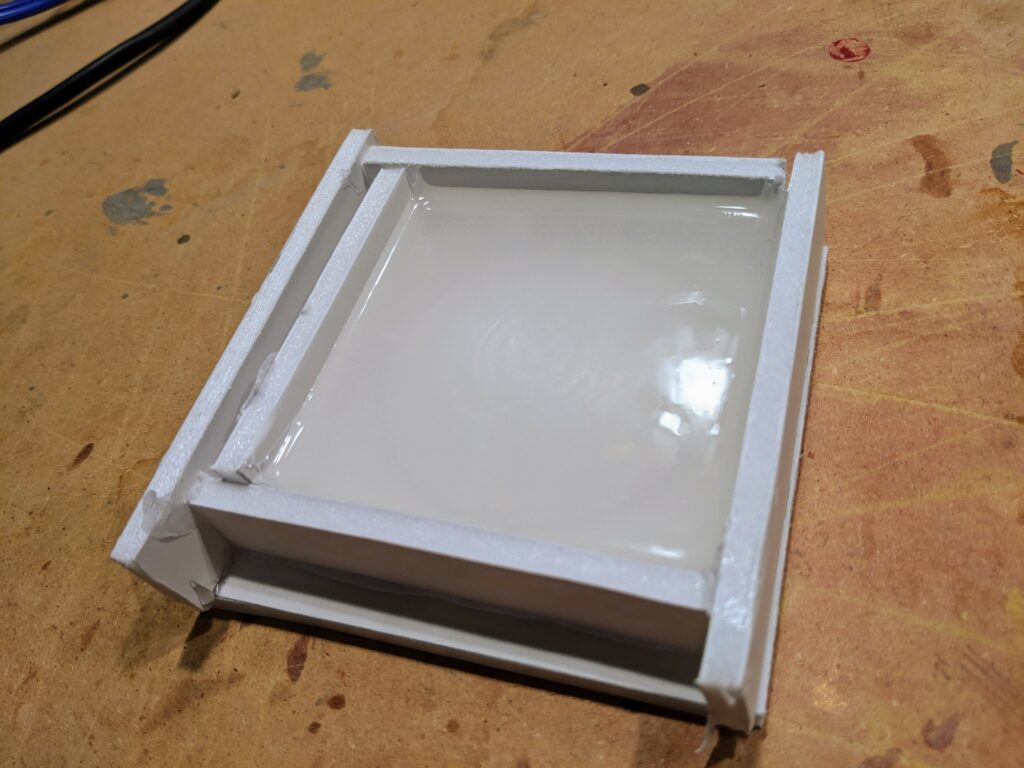
The mold takes about 12 hours to cure. There was absolutely no smell, and the compounds were easy to clean, unlike 2 part epoxy resin.
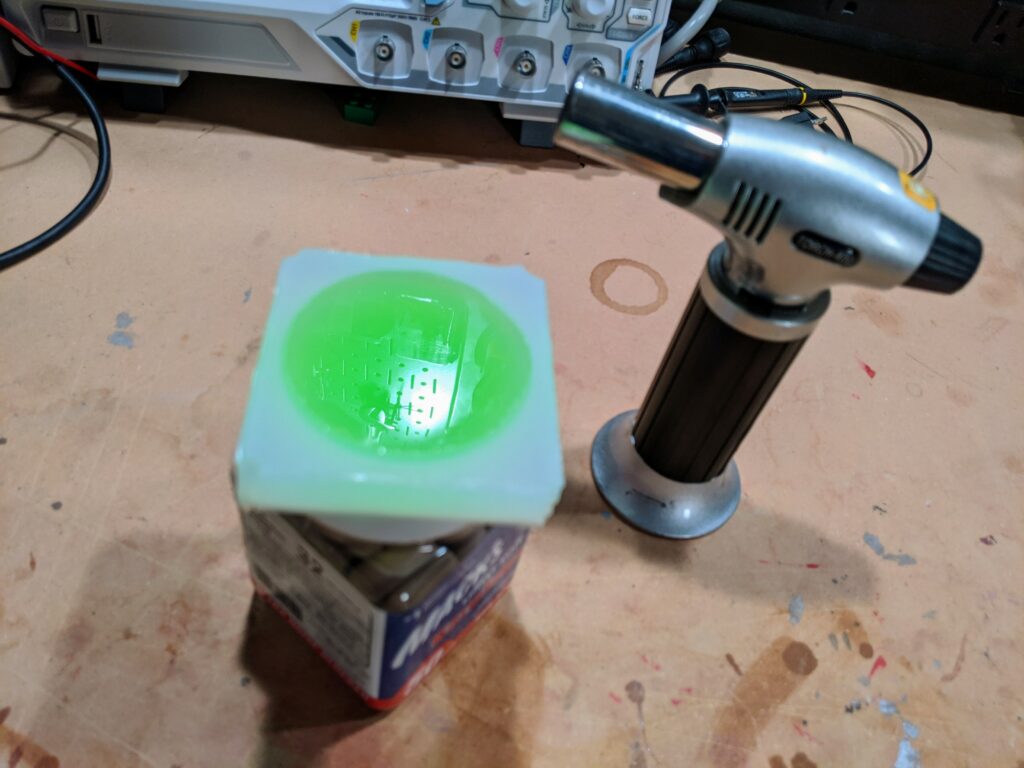
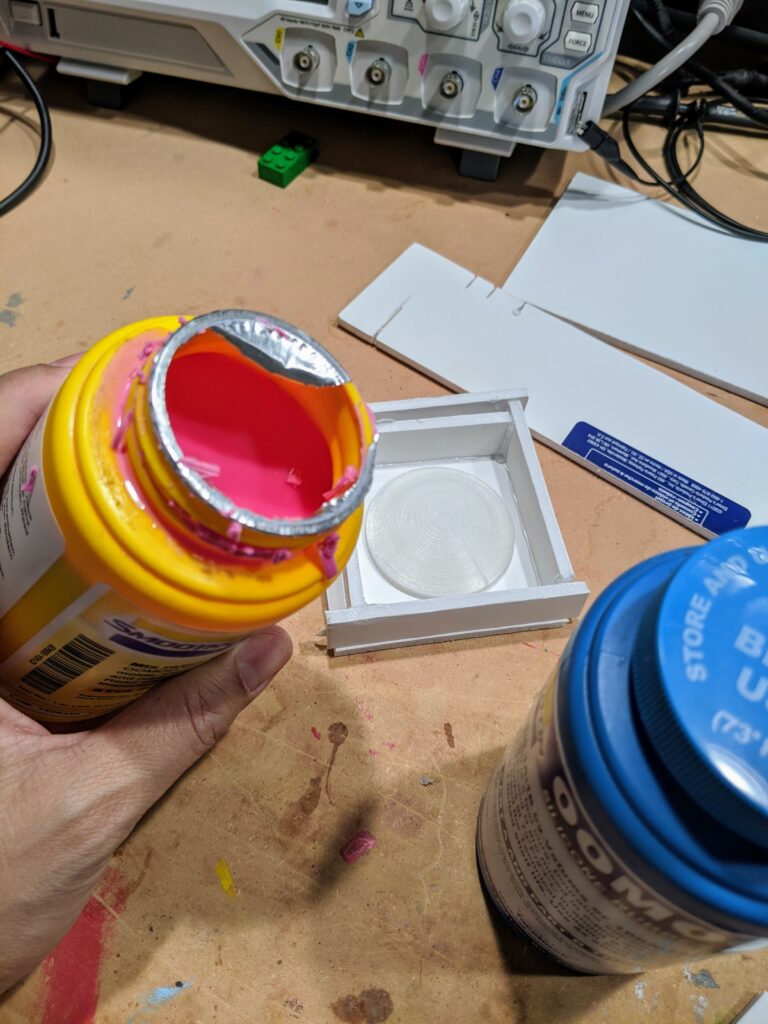
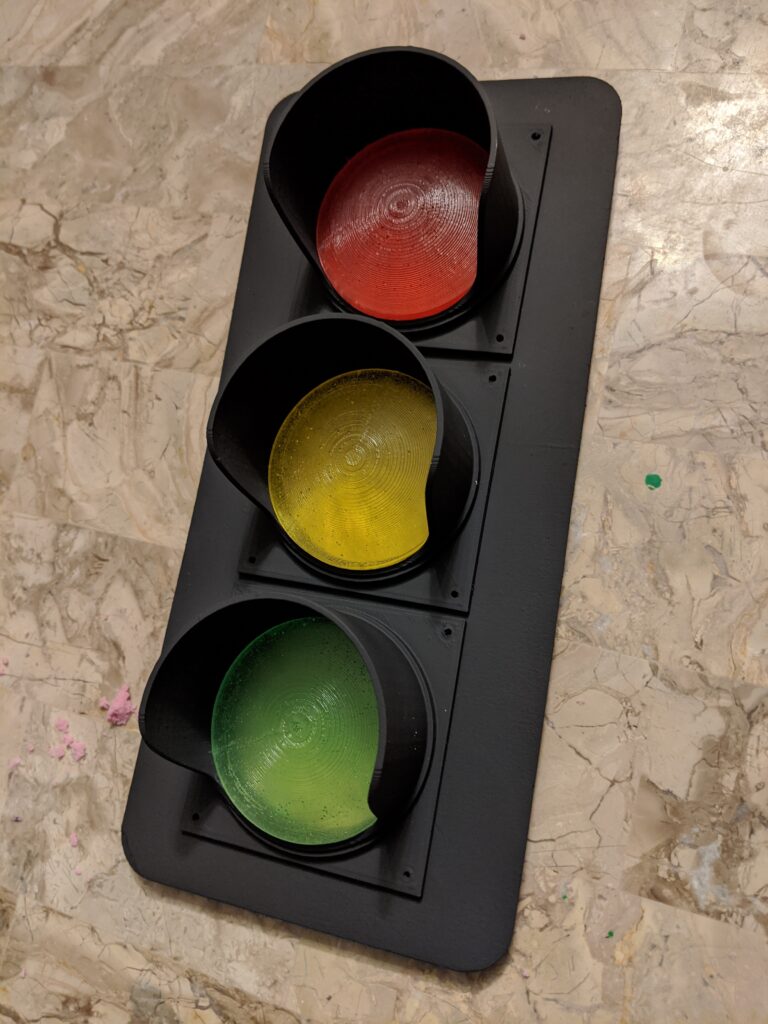
I normally color resin with a few drops of food coloring, but usually you can use acrylic paint. I bought some resin coloring just for kicks and the green came out perfect. The red however was way to opaque and I resorted back to food coloring to get a more translucent resin.
Green and yellow came out perfect the first time. Red took me 3 times to get right. I don’t have a degassing chamber so there are tiny bubbles, I think it will help with diffusing the LEDs under. We shall see!
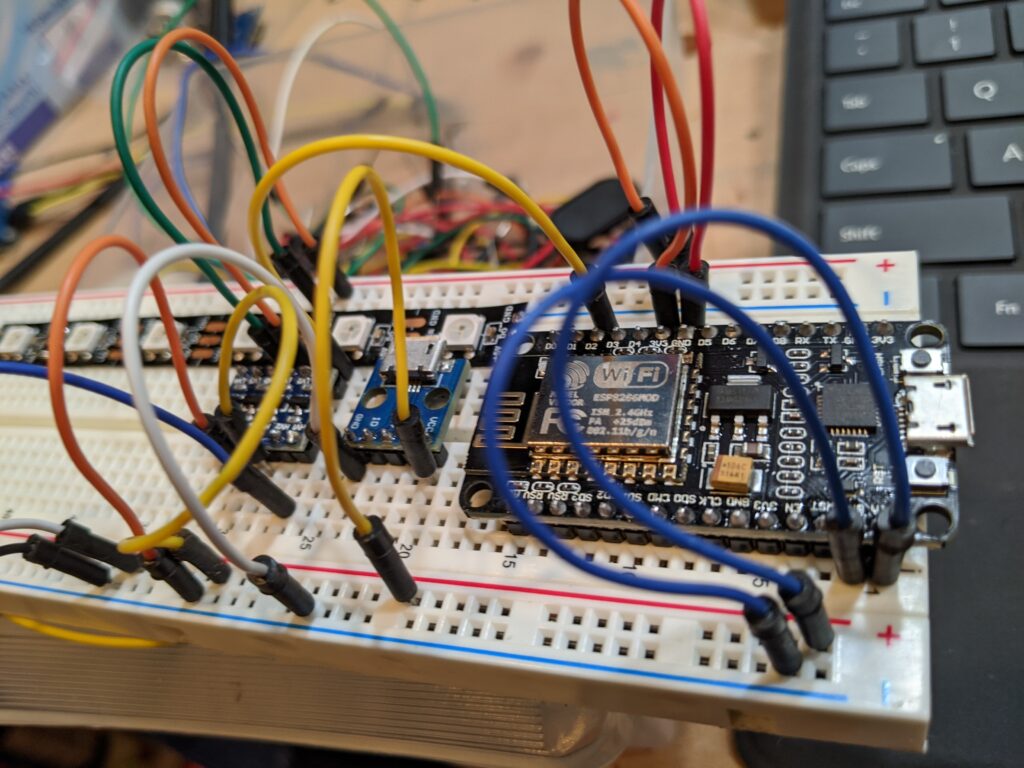
ESP8266 is a 3.3v controller. 8212b is a 5v signal. Here I am doing a quick prototype test to see if the signalling works… spoiler alert, it didn’t. Adafruit’s NeoPixel library didn’t like it.
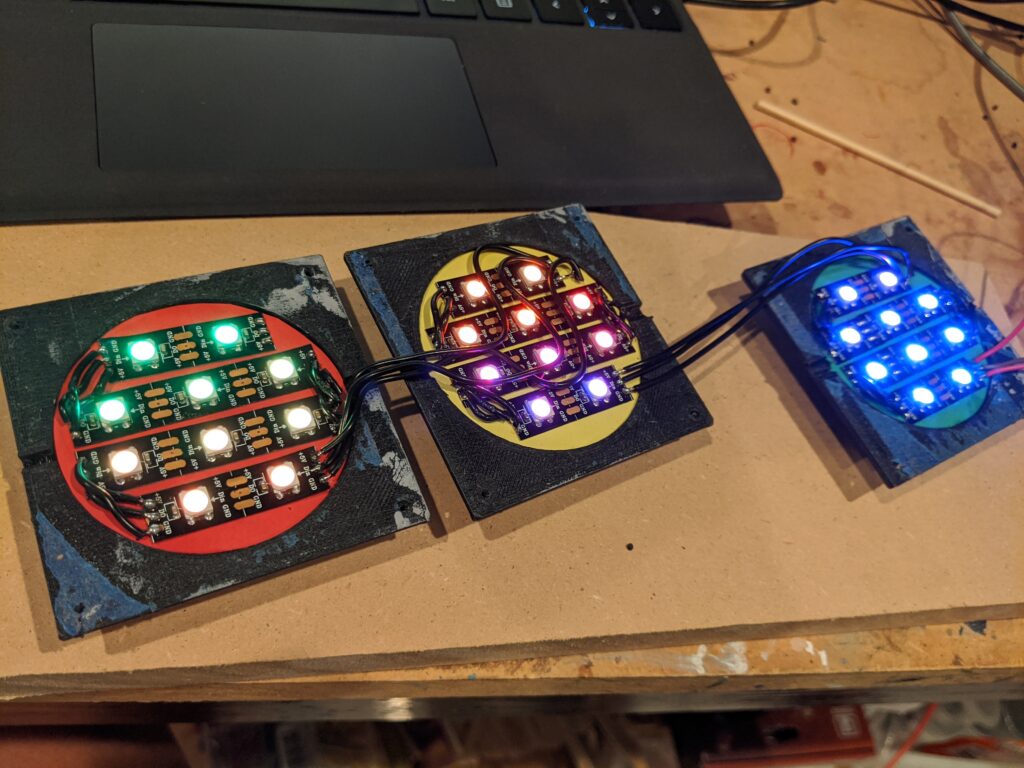
I used 5v neopixels (8212b) to form an array of lights, 10 LEDs for each street light. I mounted card stock under it to help with the color and adhesion.
Using 5v Arduino Nano I was able to get good signalling to the 8212b neopixels. However, this needs WiFi so I switched to a beloved ESP8266 3.3V microcontroller. I could not get the signal to work correctly using Adafruit’s NeoPixel library. Instead I had to switch over to FastLED.

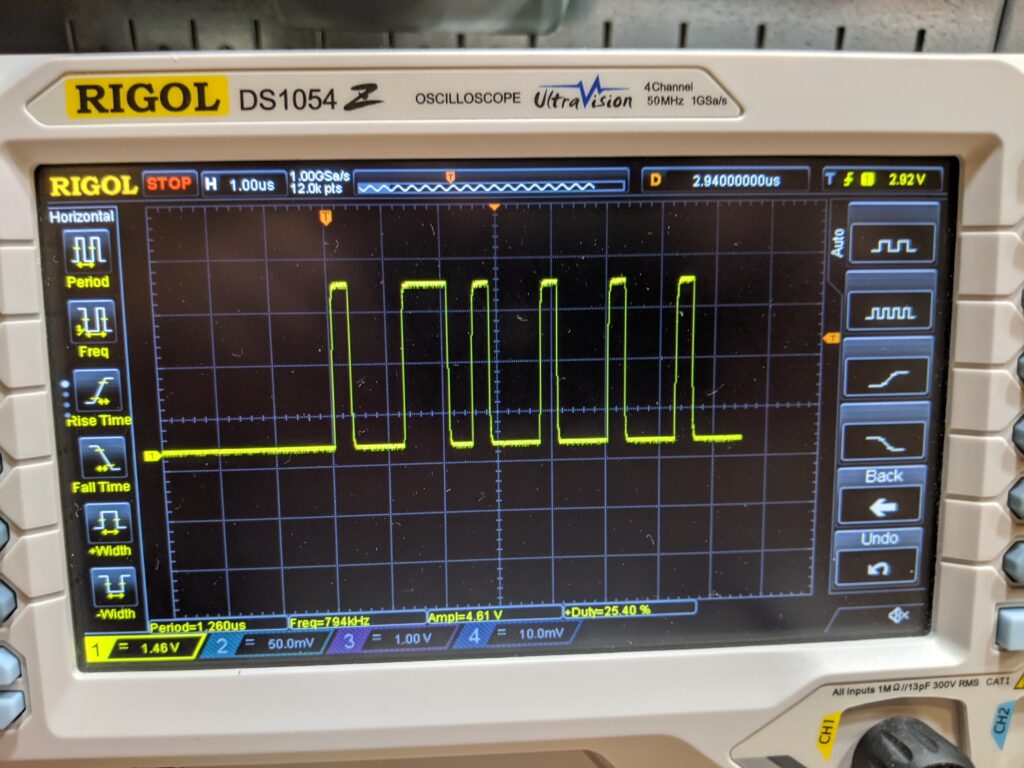
I used my trusty Rigol to try to diagnose the difference between the signal libraries. At the end of the day, I don’t have time to debug the Adafruit library and running with FastLED. Also look how clean the signal is! those series resistors really help with bounce!

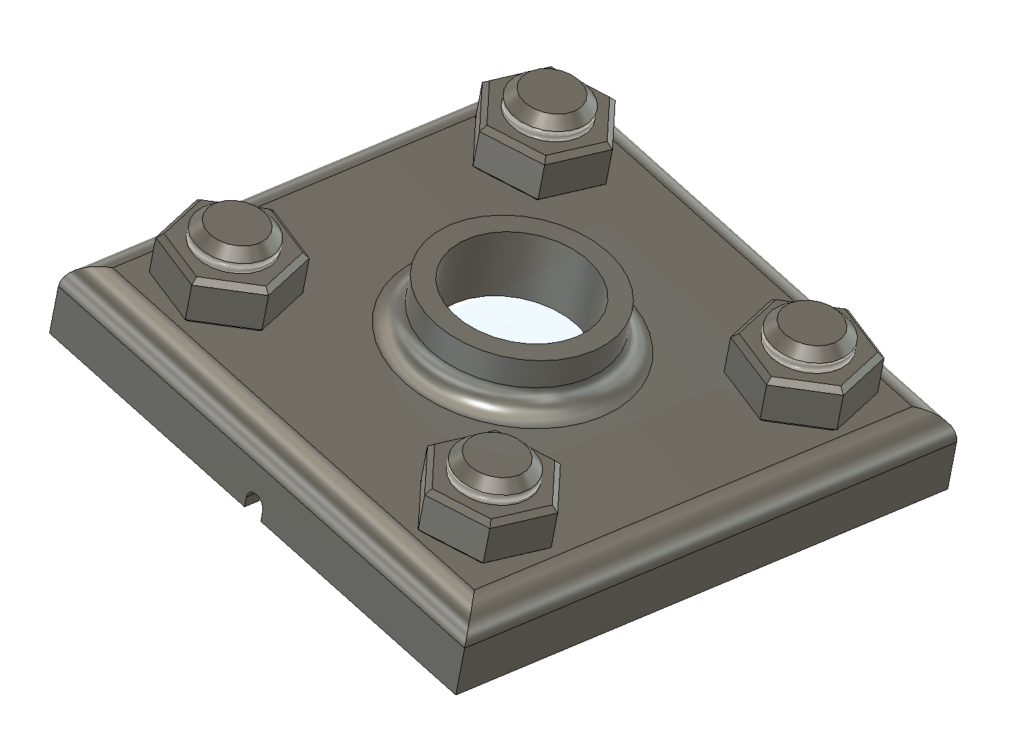
I bought a cheap PVC pipe to use as the metal light pole and just fabricated the base, cap, and mounts. I then painted everything with silver/metallic paint which came out much better than I expected. I had to sand the smooth PVC pipe a bit which gave the paint a grainy metal finish which was perfect.
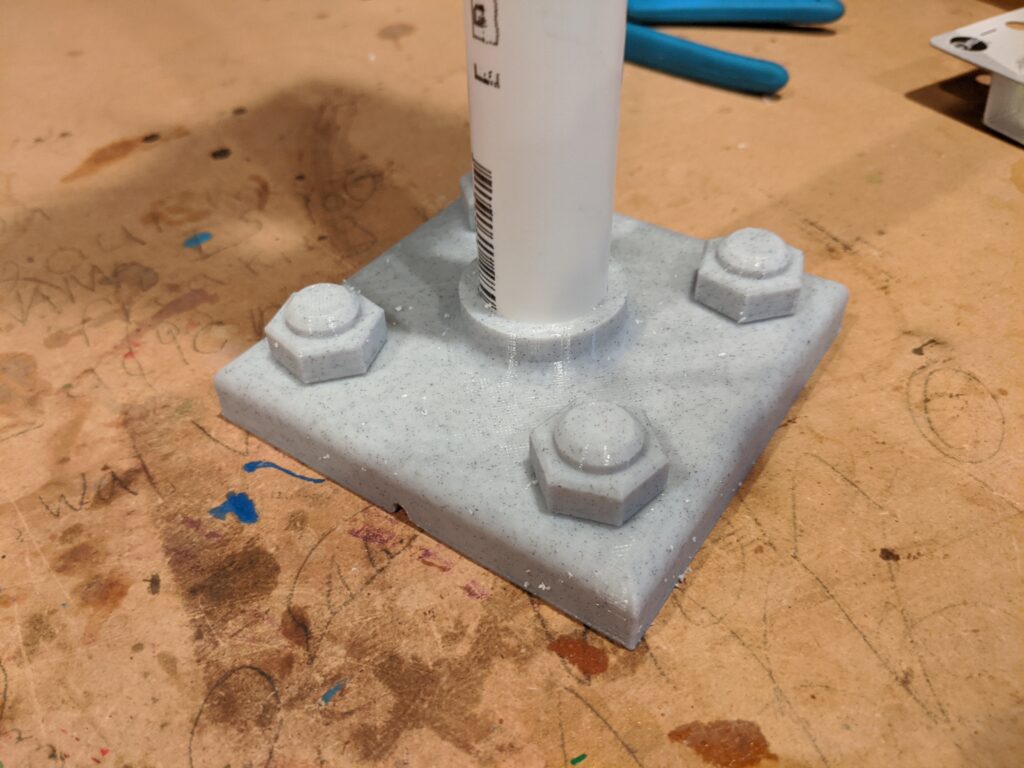
The base fit the PVC pipe perfect, thanks to my trusty digital caliper. The base is slightly hollow to allow the ESP8266 controller to fit within the base flush. The only thing that is needed is a 5v micro USB cable which I left a cutout for.

Above is the C/C++ source code for the light itself. In order to keep code flexible, it acts as a thin client that connects to WiFi and listens to requests on the LAN via UDP packets to port 31337. I chose UDP just to keep it simple. I didn’t need any packet acknowledgement because I consider this low priority traffic (pun intended).
Basically light turns on, connects to wifi, then waits for a light pattern to be received. The pattern then plays continuously until the next pattern is given. The code is organized as a basic solid state machine with only 2 states for the time being.
The pattern string is 2 characters.. “XY” where X is the color (or brightness intensity) and Y is the time interval. R is red, Y is yellow, G is Green, C is clear. If the first character is a number 1-5, then that signals (pun intended) the light to change the brightness. Finally, the letter E specifies the end of the sequence.
For example, “11R5C1R355Y3C5E” – Sets brightness low, then long red light, quick clear, medium length red, set max brightness, medium length yellow, then clear for a long time, then repeat. Currently there is no way to turn on more than 1 light at a time.
The server side code is where all the heavy lifting gets done to monitor weather, stocks, pings, and other fancy events. I thought about building all that into the light to be standalone, but then realized how spoiled I am with high level coding and didn’t want to bother.
I’ll post the server-side code later after a bit more work. It’s running on Python 3 right now. I’m currently working on it to allow “plugins” so anybody can add a plugin for “weather”, set their own thresholds, and design their own light patterns for each event.
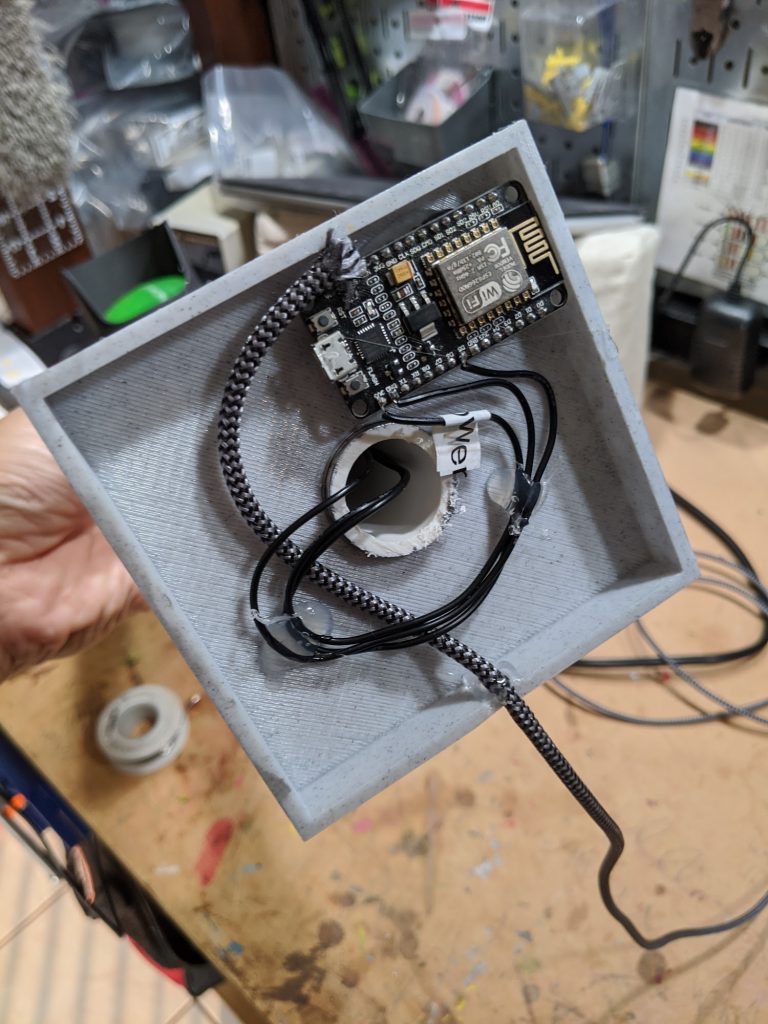
Ok, I got kind of lazy here. I used hot glue to mount the ESP8266 board to the bottom, and used an old broken USB cable to power it via the Vin pin. The board itself runs at 3.3v but the Vin pin accepts 5-20V dc. The broken USB cable red/black wire is a 5V/gnd and I cut off the extra data cables.
I’ve been running this and slowly iterating the code on the server-side. It works great, just writing new plugins when I get the time.
Mistakes
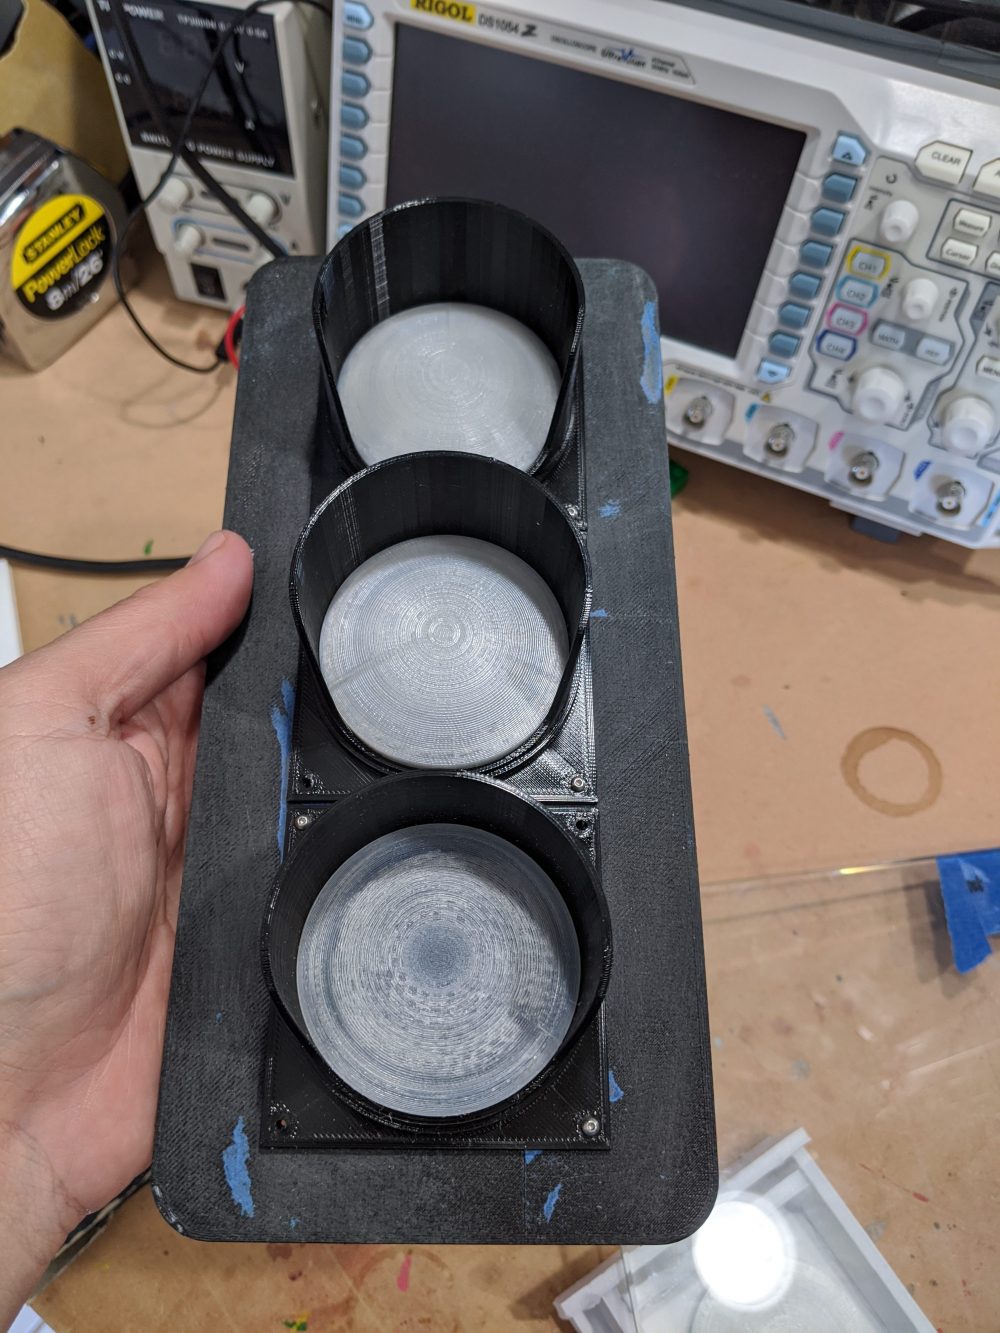
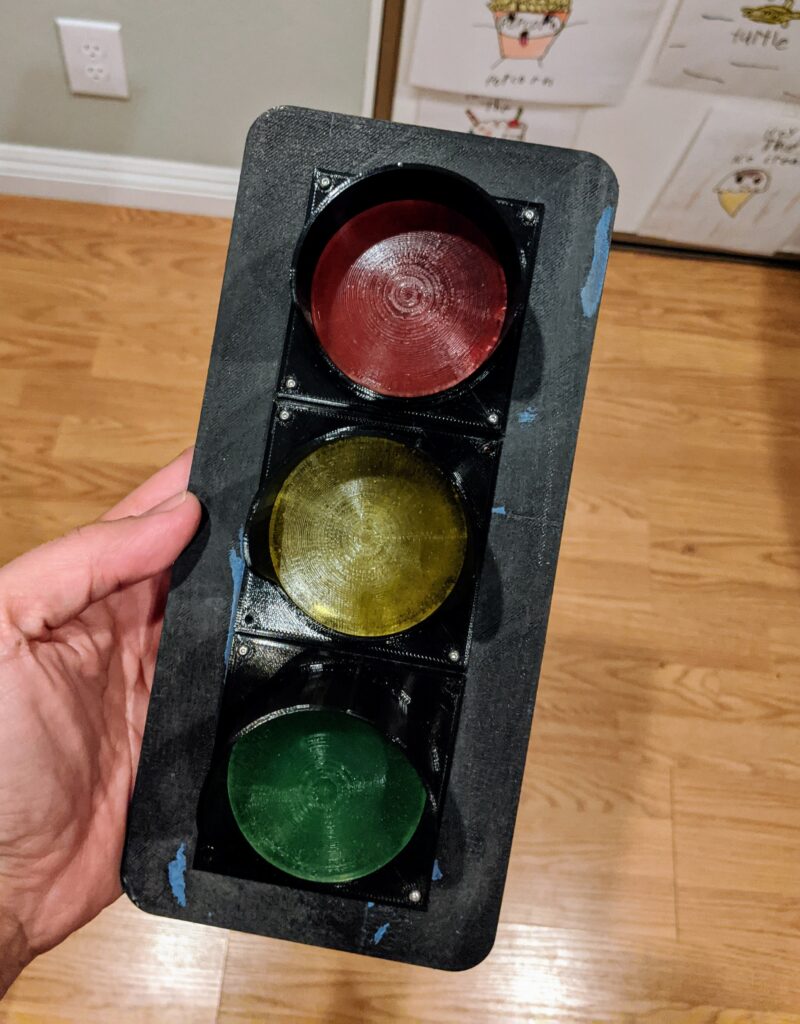
The big black panel was 3D printed.. what a waste of time. Next build I would opt to use the laser with a piece of acrylic or plexiglass instead just for durability and time savings.
Me grown up in future: Drives*
Me again in the future: wait isn’t that from tHiS weBSIDTe???????