Yi Home cameras are inexpensive, but you can’t use them outdoors. I built this 2 piece window mount (with SVG sticker for those who have a Cricut). This project was an exercise using Fusion 360 and threads, as well as practicing assembling components which is much like assembling parts in SolidWorks.
The Tools
- 3D printer
- Cricut Maker
- Fusion 360
- Cricut Maker
The Materials
- PLA filament
- double sided mounting tape
- vinyl adhesive
- Yi Home Camera
The Design
In order for the Yi Home IR (night) lights to work, the camera must be completely touching the glass of the window you’re mounting it do. Since mounting tape comes in different thicknesses, I decided to make this 2 pieces with threads so that the depth could be adjusted.


Mount the base to a clean window with your choice of double sided mounting tape, insert the camera into the other piece, screw in the camera until you feel it press up against the glass. If you leave a gap, you will see the reflection of the infrared lights.
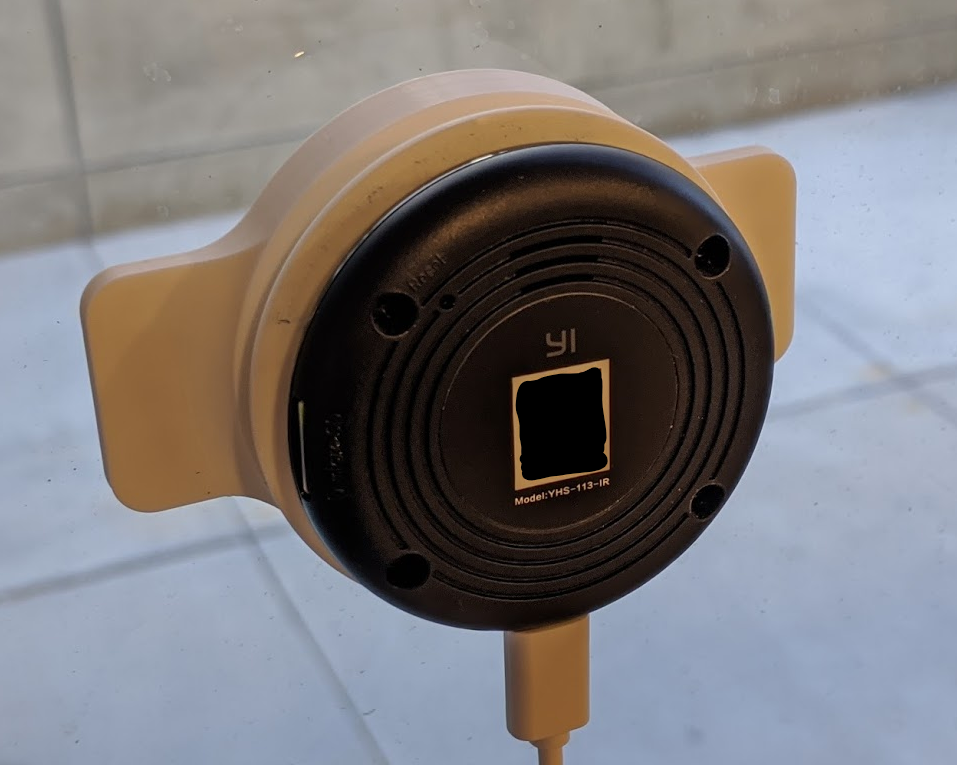
Here is the final 2 piece product mounted to the window. It works great! The threads are really tight, and had to do some light sanding and screw and unscrew many many times to wear down the edge a bit.
Omg 😮
Hi. Do you sell these please. Great item.
Liz