Raspberry Pi Rubik's Cube Case
I have a 3TB RAID1 ext4 NAS and set up a Raspberry Pi 2 to serve as a streaming media center. I wanted to come up with a cool case. Since the dual drives + Pi is roughly square-ish, I came up with the idea to make a rubik's cube case. Initially it was just going to be a solid block, but then I decided to make it actually rotate horizontally.

Renders

Build photos
About this build
I have a 3TB RAID1 ext4 NAS and set up a Raspberry Pi 2 to serve as a streaming media center. I wanted to come up with a cool case. Since the dual drives + Pi is roughly square-ish, I came up with the idea to make a rubik's cube case. Initially it was just going to be a solid block, but then I decided to make it actually rotate horizontally.
The Materials
- 1/4 MDF panels
- color card stock
- Raspberry Pi / NAS hard drives, power cables
- black matte spray paint
- wood glue
- spray adhesive
The Tools
- CO2 laser cutter
- wood glue
- Fusion360
- Lightburn
The Build
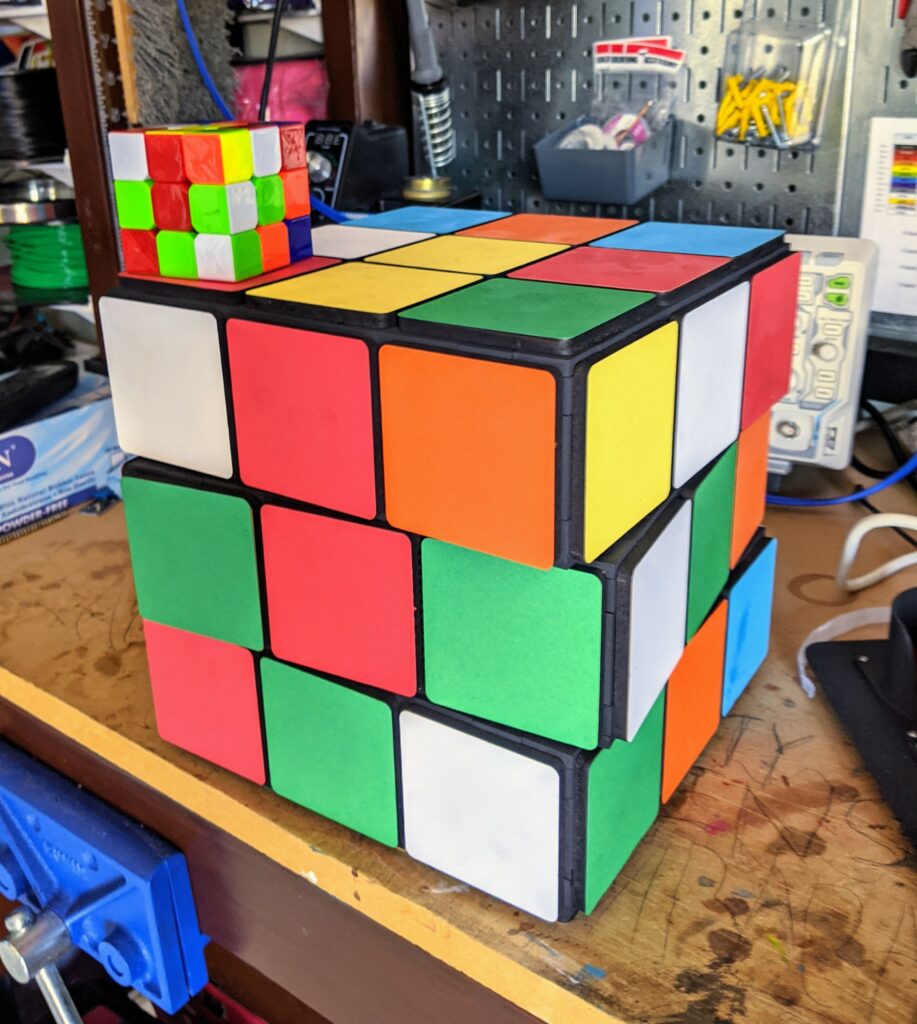
One side of the cube with the color panels
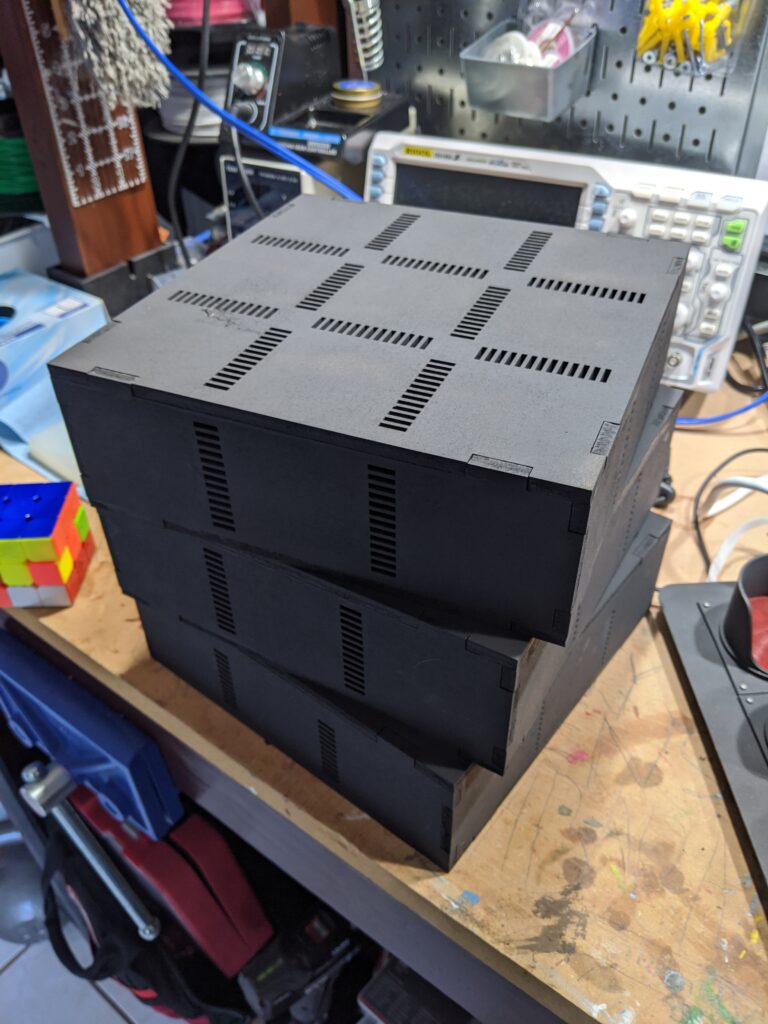
All the panels will be made of 1/4 MDF. If you look closely, you can see the perforations between the color panels that is meant to allow air flow.
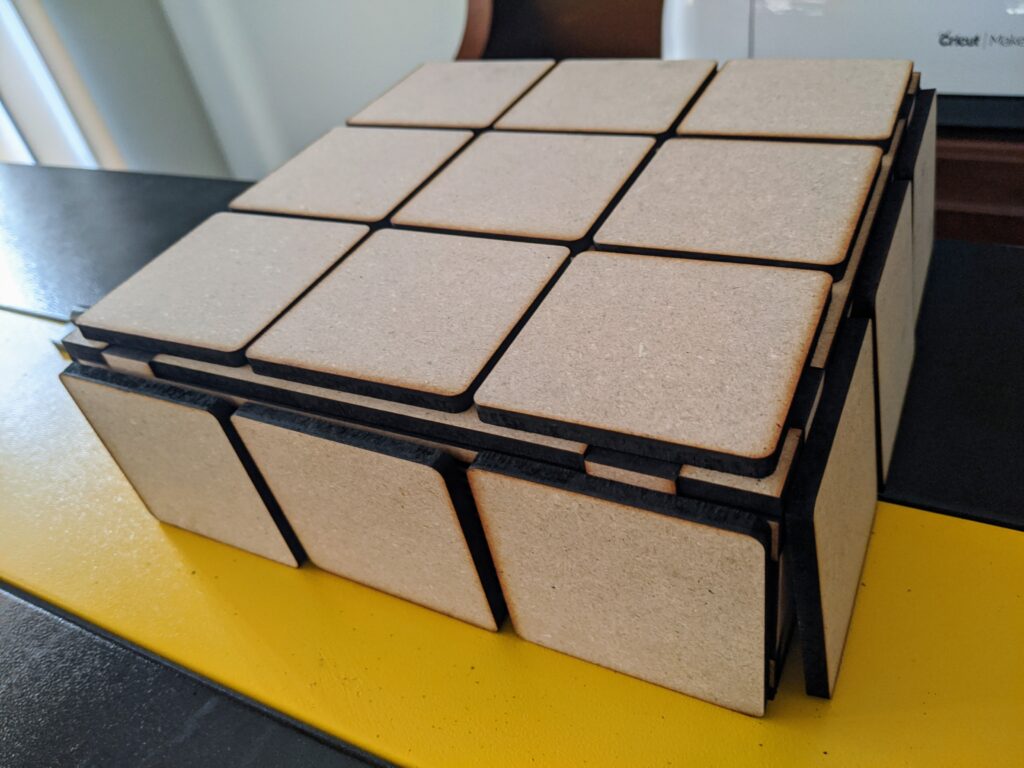
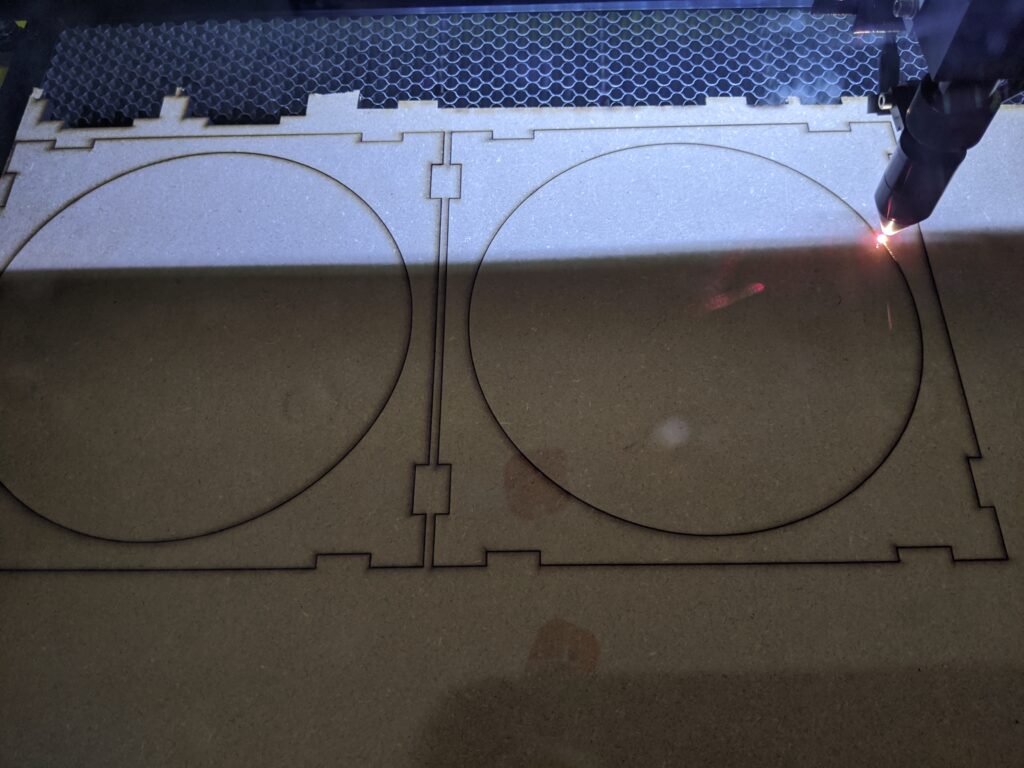
First cut, surprisingly everything is working out perfectly
This is the most cutting I've ever done for a project. I used a full 2x4 and them some.
60 watts and 50-60% cutting light butter
I noticed that new/dry MDF cuts much better than old or boards with some condensation. Usually I would have to pop the pieces out, but this project, everything fell out perfectly.
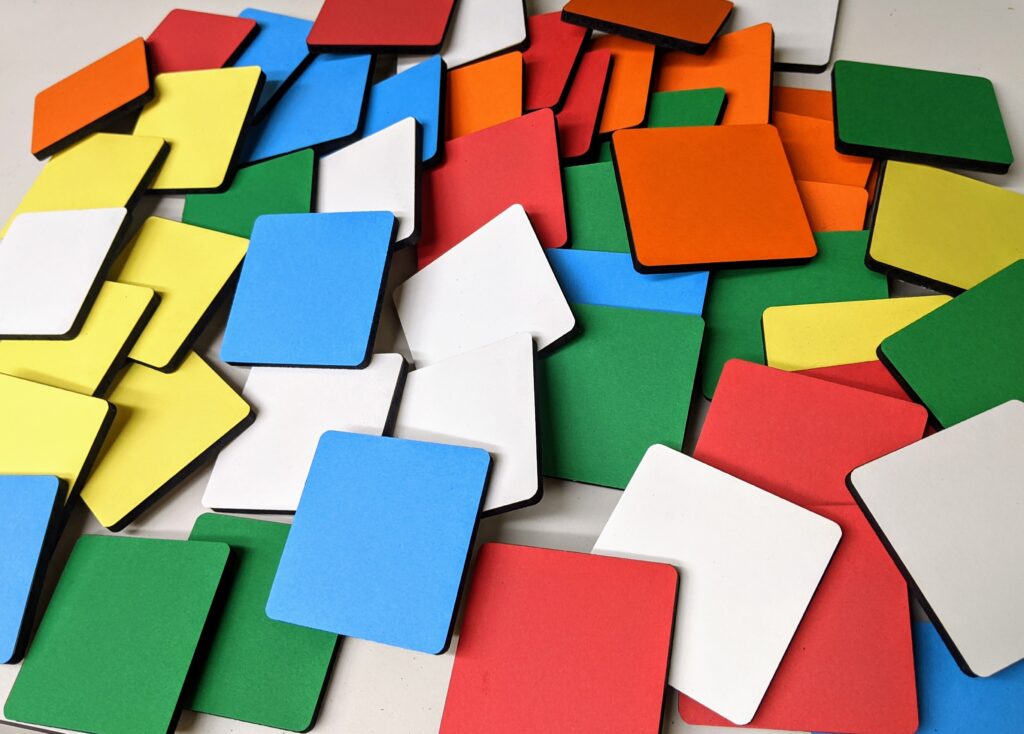
I used card stock to color the panels
I used adhesive spray to add the colored card-stock to the panel pieces. I designed the panels to stick up to give the the colors texture.
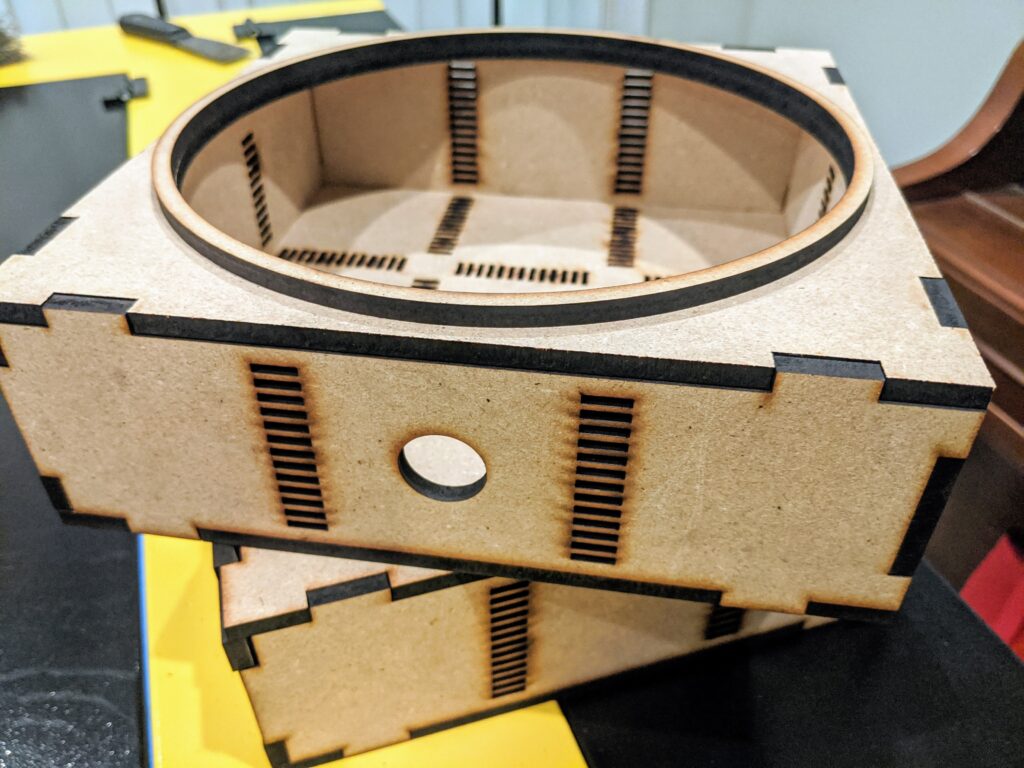
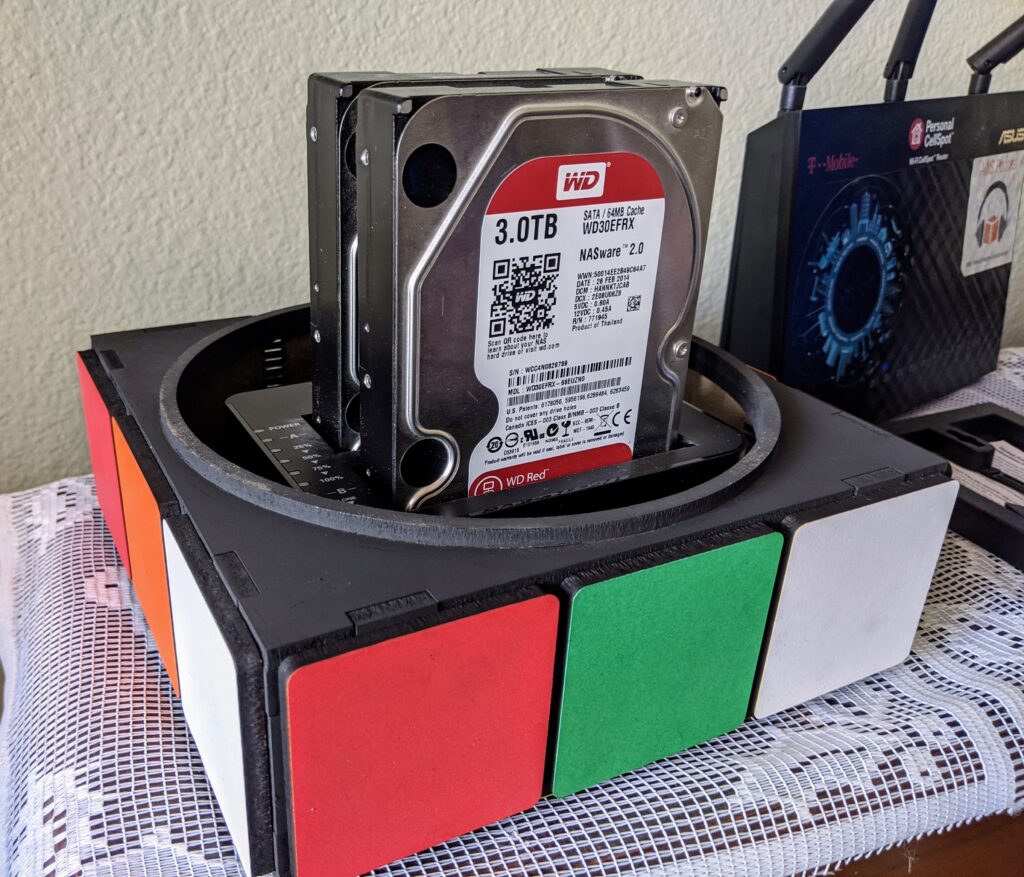
The inside of the cube
The design uses a thin cut ring to allow the 3 levels to spin around. I just used wood glue to stick the thin ring to the 1st and 3rd levels, and the middle level circle is slightly larger. I didn't leave any tolerance, but it was a tight fit and so far works perfectly.
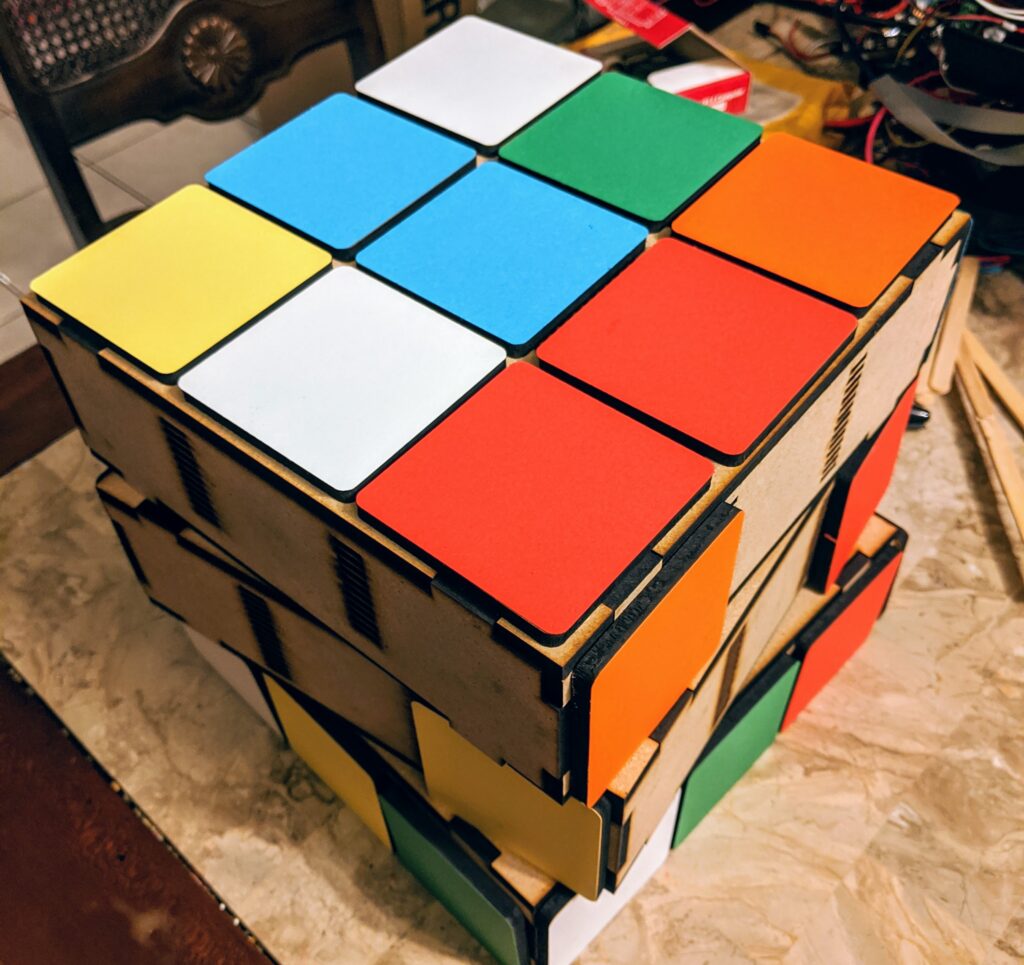
Got impatient placed some of the panels on for a preview Painted the interior with matte paint
The inside of a rubiks cube is black, so did a light spray of matte paint. Also works to hide the laser cut edges.
Final product, time to install the Raspberry and hard drives.
All that's left is to install the hard drive and Pi. In retrospect, I made the cube a little too big. I could have spent the time to disassemble the SATA base/connectors. I might redo this to make it more compact.
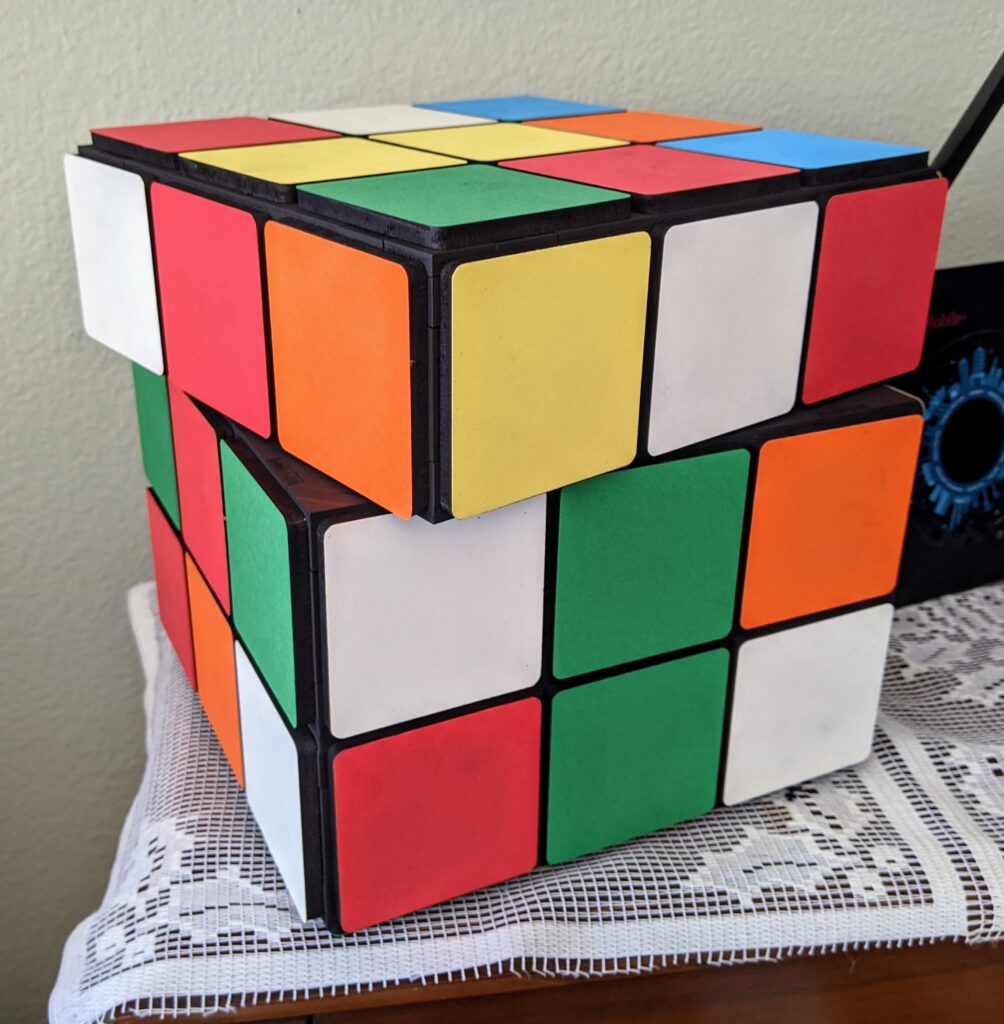
Installed internals, up and running!
Here is its final resting place, next to my router, serving media. If i didn't make it able to turn, I could have definitely made the case smaller.
Mistakes
- built the inside too large, however, might make the most of it by adding motorized movement
- used card stock instead of adhesive vinyl, which would look more like a rubik's cube
- the blue color i'm not a fan of, need a darker blue but we're in a quarantine because of coronavirus
Updates
- I got new cardstock and updated the blue color to match the classic cube, so much better!
- Replaced the Pi 2 1GB with Pi 4 4GB... runs so much faster